Integration of DNS Server and VMware Aria Automation 8 to Create DNS Records on Microsoft DNS Server
In this post, I’ll describe how to create a DNS record when the cloud template configuration sets a static IP address on a cloud VM after deployment.
Prerequisites
- Ensure your assembler template works fine and sets the hostname and IP address on the deployed VM.
- Add the Microsoft DNS server as a PowerShell host in VMware Aria Orchestrator.
Steps to Add the DNS Server as a PowerShell Host
- Find the Workflow “Add a PowerShell host” and run it.
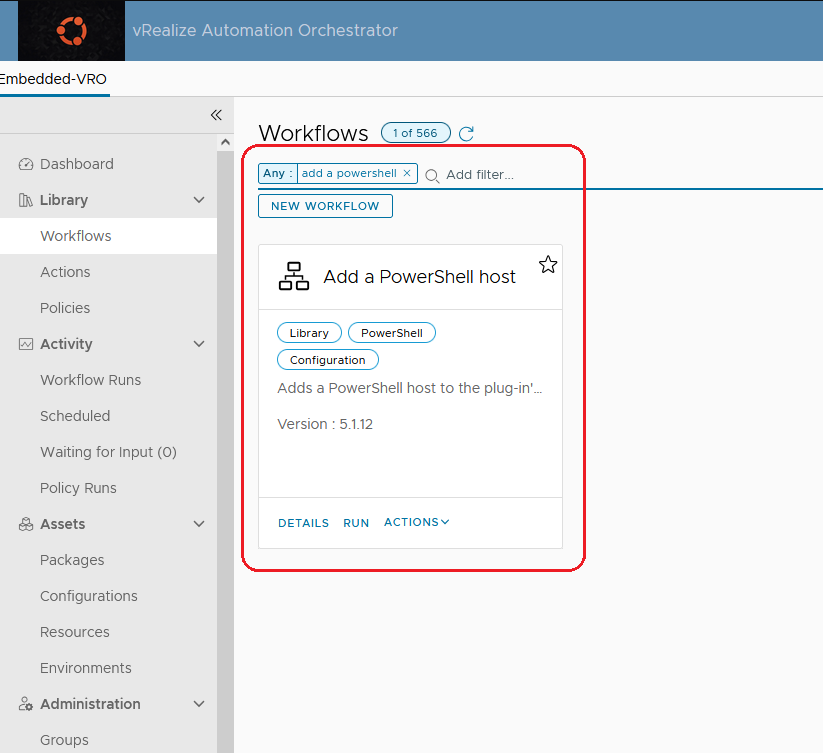
- Provide the name, IP address of the DNS Server, port, and protocol.
- The port for HTTP is 5985 and for HTTPS is 5986.
- For production, use HTTPS, but for lab environments, no security configuration is required.
- If the workflow fails to run because the remote target (DNS server) does not allow remote connections, run these commands locally on the DNS server:
PowerShell:
# Enable-PSRemoting -Force
# Set-Item WSMan:\localhost\Client\TrustedHosts -Value "Automation IP Address"
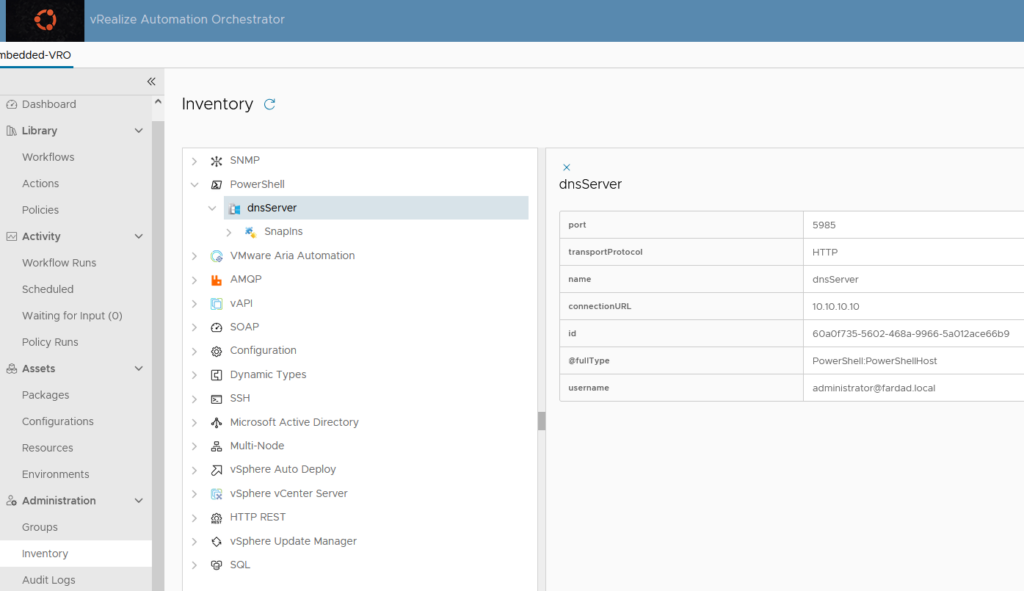
# Set-ExecutionPolicy -Policy RemoteSignedAfter adding the DNS Server you will be able to see it on VRO inventory.
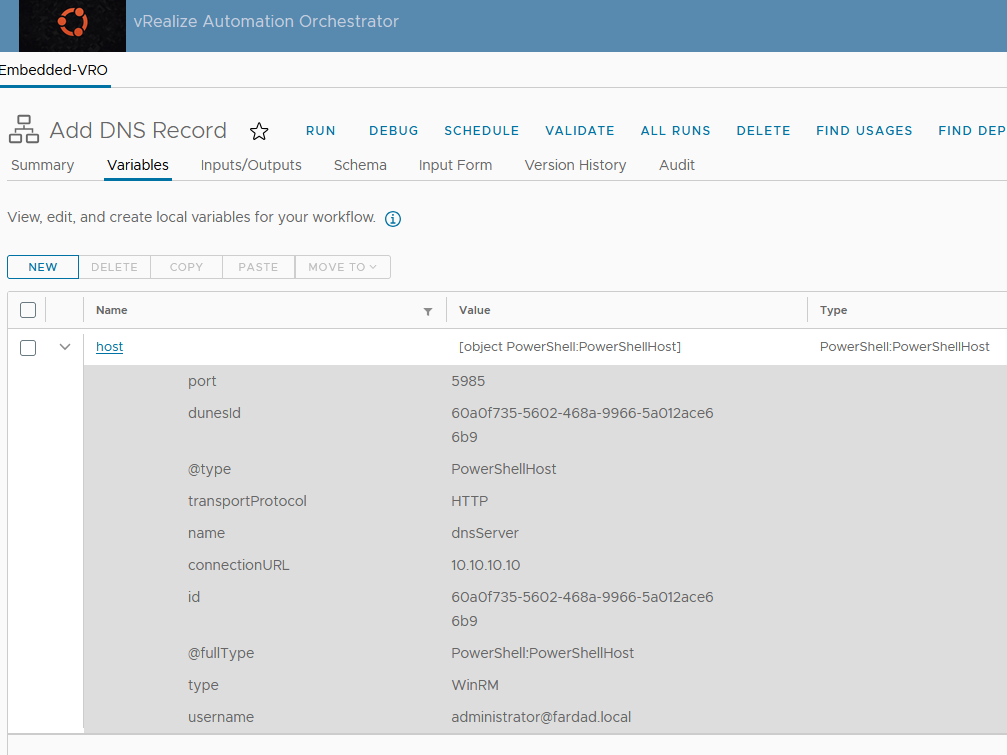
- Create a new Workflow and give it a name:
- Go to the variables tab and create a new variable:
- Name: host
- Type: PowerShell:PowerShellHost
- Value: dnsServer (or the name of the DNS server you added in the previous step)
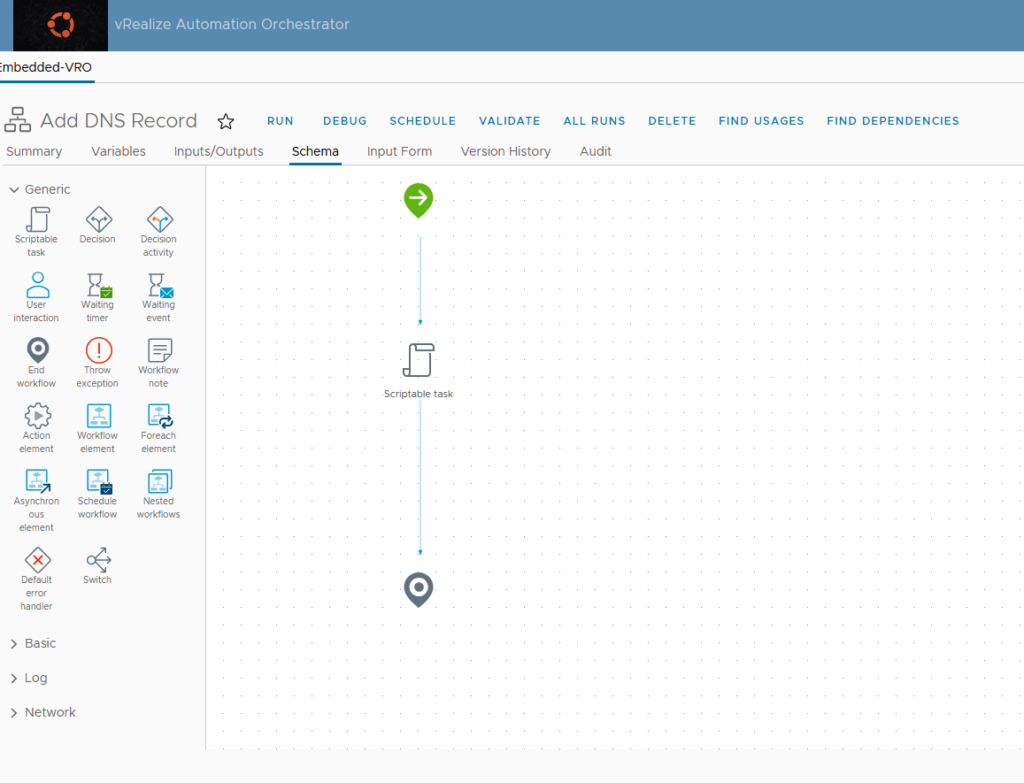
Create a Scriptable Task:
- Go to the Schema tab and add a Scriptable task to the Schema graphical environment.
- Run a test command to check everything works fine. Click on the scriptable task, open the general tab, and expand the inputs and outputs.
- Add the host to inputs and go to the scripting tab. Select JavaScript and copy this script:
javascript
var session = host.openSession();
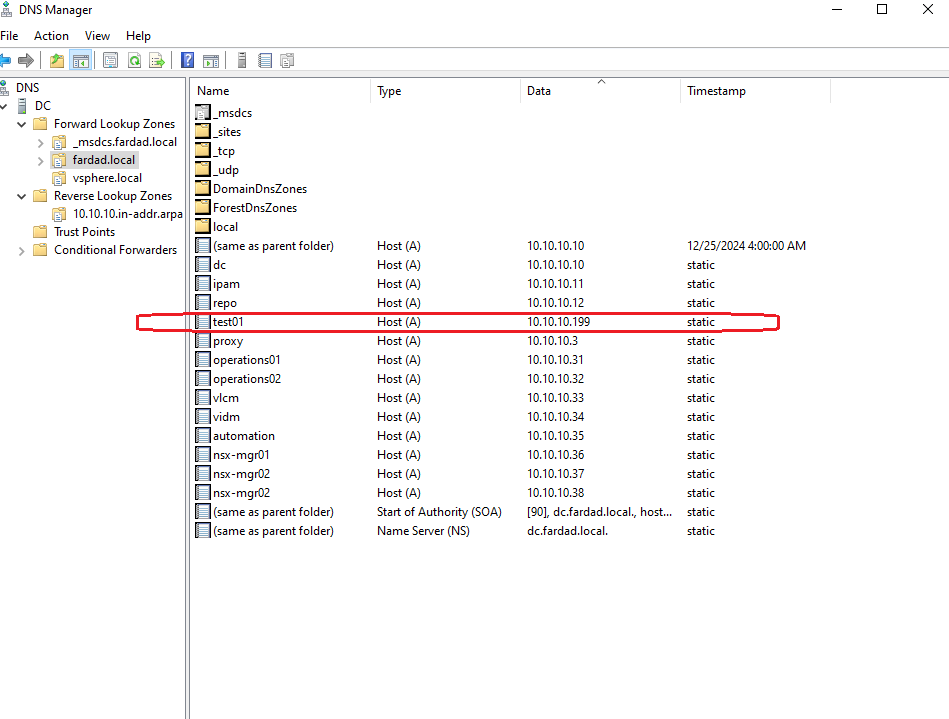
var command1 = "Add-DnsServerResourceRecordA -Name test01 -ZoneName domain.local -IPv4Address 10.10.10.199 -CreatePtr";
var result = session.invokeScript(command1);
System.log("Command Sent: " + command1);
System.log("Result: " + result);- Use the domain name of your environment inested of domain.local
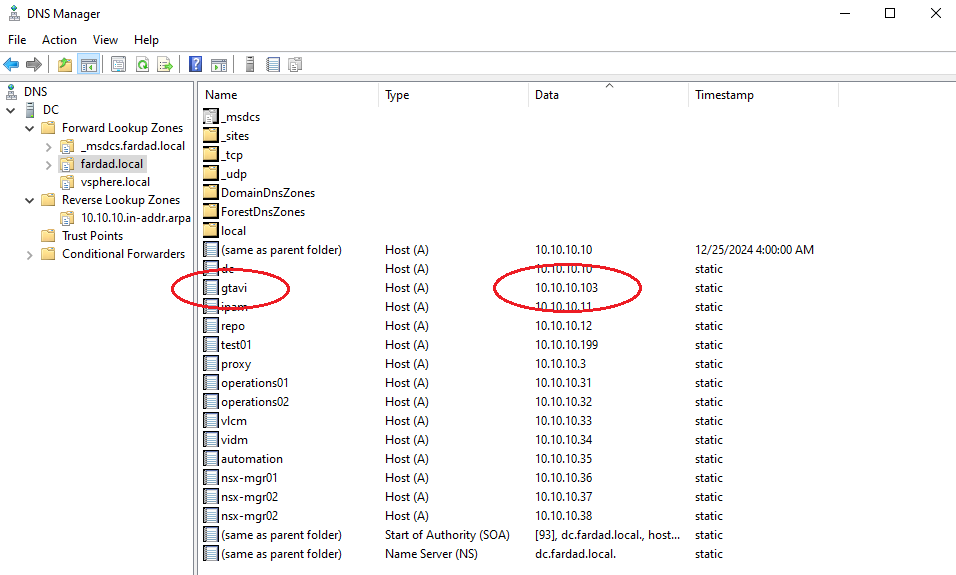
- Use a test IP address in your range. In this case, I use 10.10.10.199 and for hostname use test01.
- After a test run, you should see a record on your DNS server console.
After running the test, you should update the Workflow as follows:
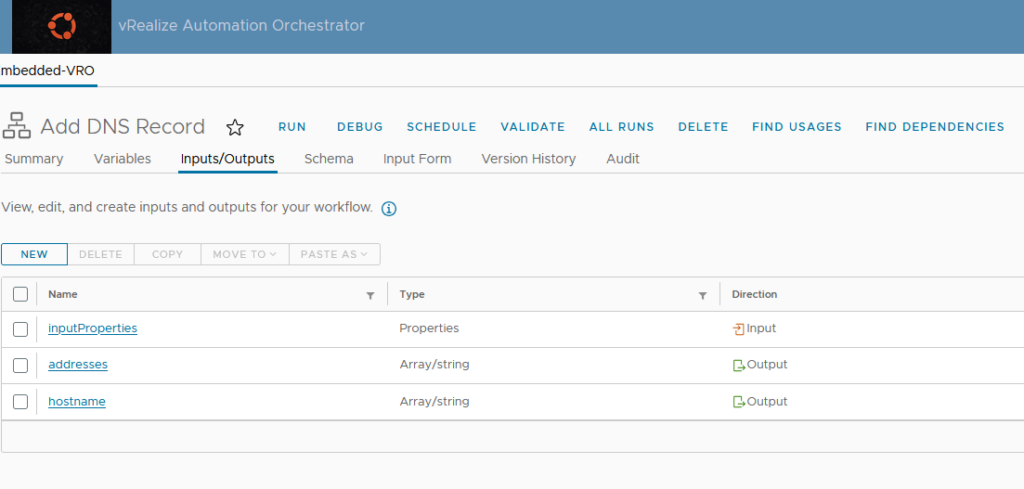
- Add Inputs/Outputs:
- Go to the inputs/outputs tab and create these:
- Name: inputProperties, Type: Properties, Direction: input
- Name: addresses, Type: Array/string, Direction: output
- Name: hostname, Type: Array/string, Direction: output
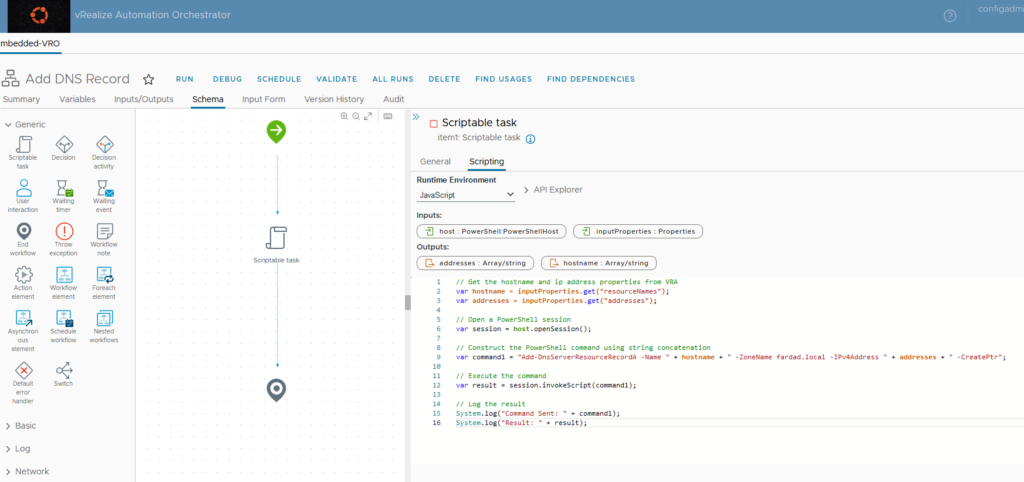
Update the Scriptable Task:
- Go to the schema and click on the scriptable task. Go to the general tab and add inputProperties in input and hostname and addresses as the output.
- Update the JavaScript code to:
javascript:
// Get the hostname and IP address properties from vRA

var hostname = inputProperties.get("resourceNames");

var addresses = inputProperties.get("addresses");

// Open a PowerShell session

var session = host.openSession();

// Construct the PowerShell command using string concatenation

var command1 = "Add-DnsServerResourceRecordA -Name " + hostname + " -ZoneName fardad.local -IPv4Address " + addresses + " -CreatePtr";

// Execute the command

var result = session.invokeScript(command1);

// Log the result

System.log("Command Sent: " + command1);

System.log("Result: " + result);
After this step your Workflow will look’s like this:
- Save and exit.
Creating a Subscription
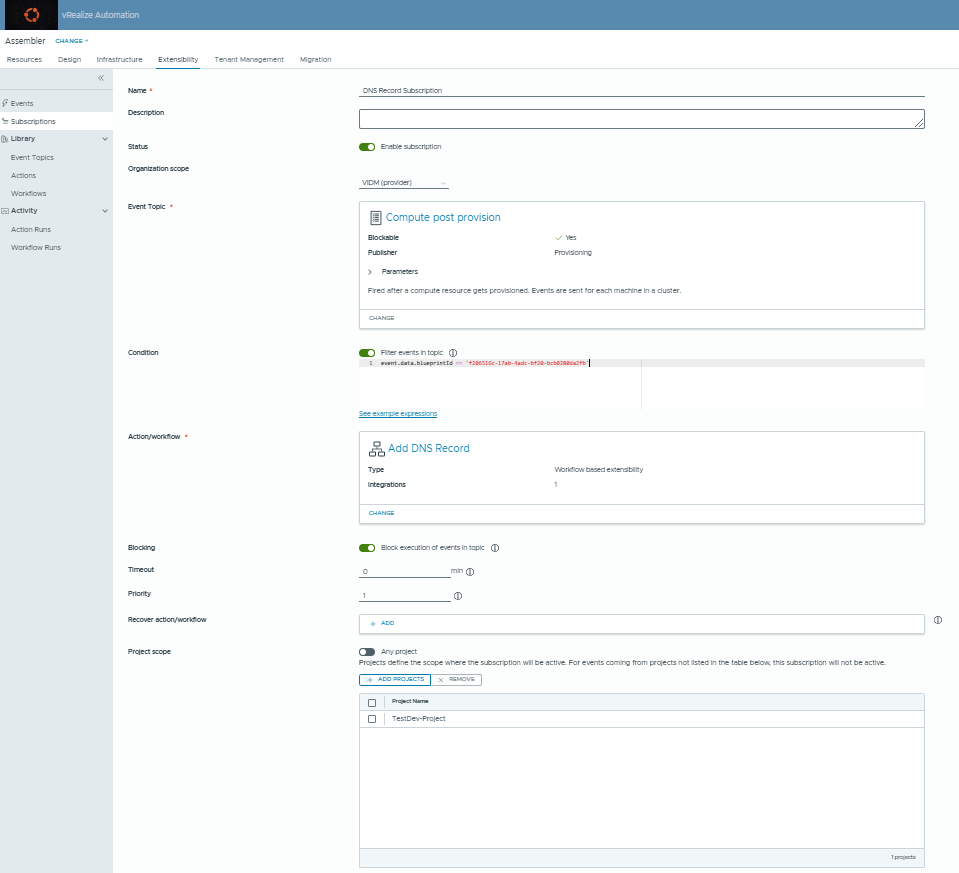
- Create a New Subscription:
- Go to the extensibility tab and create a new subscription.
- Give it a name and select Compute Post Provision as the event topic.
- Check the filter event topic in the condition and write this code to filter the subscription to the cloud template you created:
Condition:
event.data.blueprintId == 'last part of cloud template URL'In my case:
JavaScript:
event.data.blueprintId == 'f206516c-17ab-4adc-bf20-bcb0280da2fb'- Select the workflow you created before as the action/workflow.
- Select the project scope.
- Save and exit.
Testing the Workflow
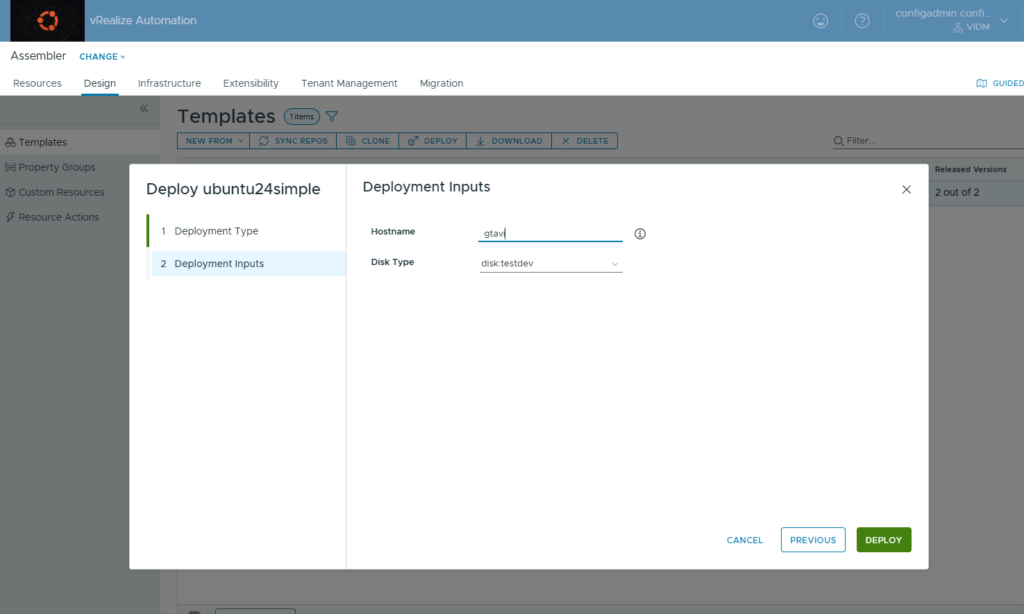
Deploy a Test Virtual Machine:
- Go to the design tab and select the cloud template.
- Deploy a test virtual machine.
- Wait for the deployment to complete.
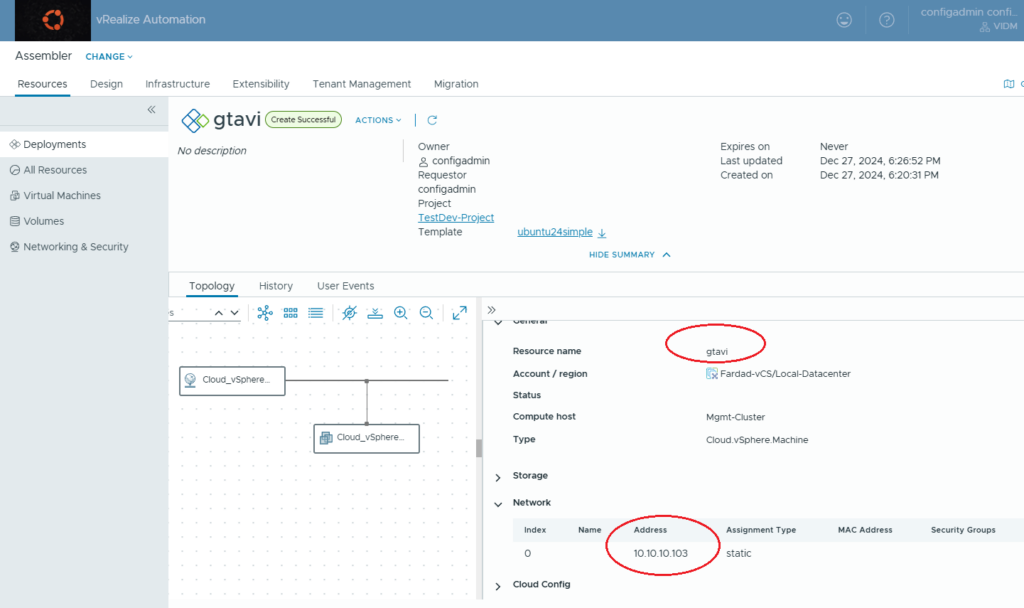
After the deployment, you should see a DNS record with the exact same values on the DNS server.
Fardad Milani
0
Tags :