
Installing VMware Aria Operations 8 with High Availability
VMware Aria Operations, formerly known as vRealize Operations (vROps), retains the core functionalities of its predecessor while introducing enhanced integration with cloud platforms. If you’re familiar with vROps, you’ll find it easy to install, configure, and manage Aria Operations. This guide will walk you through installing Aria Operations 8.17 with high availability (HA) using two primary nodes.
Why High Availability?
High availability (HA) ensures that your application remains reliable by creating an application-level cluster. In this setup, two nodes serve as primary nodes: one as the master and the other as the replica. They share the same data, and if the master node becomes unavailable, the replica node is promoted to master almost instantly. For environments with network isolation concerns, consider continuous availability (CA), which is more complex and resource-intensive but offers higher reliability. However, HA is often sufficient for most scenarios.
For more information and technical documentation visit: https://docs.vmware.com/en/VMware-Aria-Operations/index.html
Prerequisites
Create DNS records for both nodes.

Download the Aria Operations appliance.
Installation Steps
Deploy the OVA Template:
- Open the vSphere Client.
- Right-click on a resource object and select Deploy OVF Template.
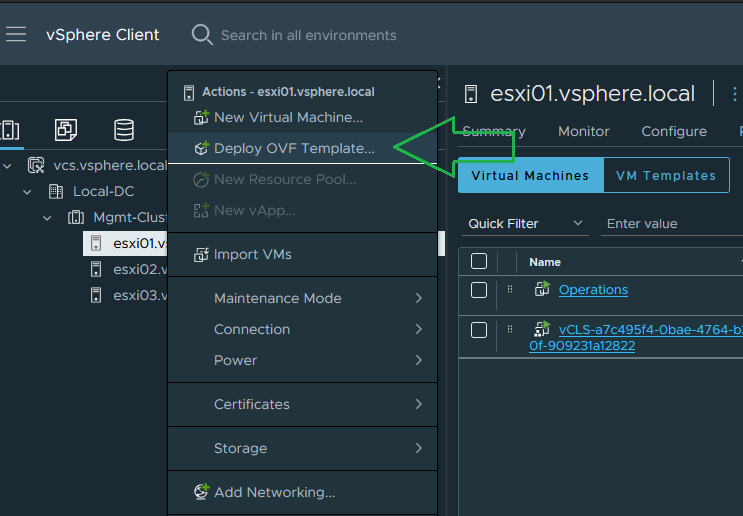
- Choose the OVA appliance file from your client.

- Specify a VM name and location.

- Select the compute resource.

- Choose the appropriate size based on your business scale. For this lab environment, I’ll choose Extra Small. (Note: Do not choose Witness; it’s only for CA scenarios.)

- Configure the network settings for Aria Operations.

- Review the configuration and finish the deployment.
Start the Operations VM:
- Monitor the deployment tasks in vSphere.
- Once deployment is complete, start the Operations VM and wait for all services to start.
Initial Configuration:
- Navigate to the Aria Operations URL:
https://aria.operations.address. In my scenario https://operations.vsphere.local - Choose New Installation.

Set the local admin password.

- (Optional) Add an external certificate generated by a CA server.
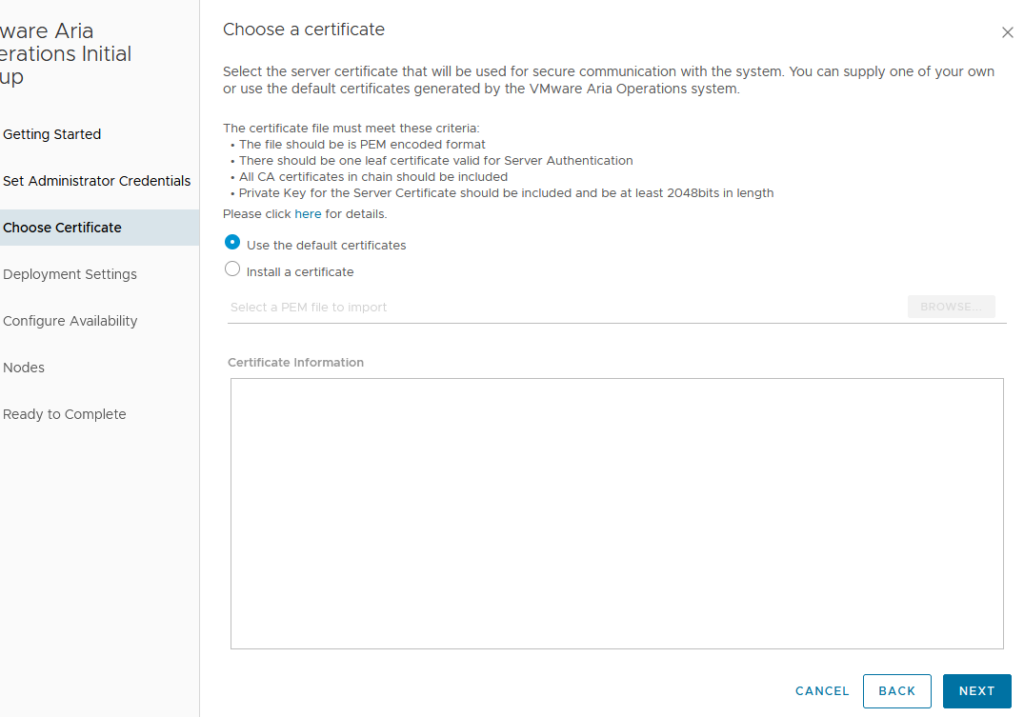
- Specify a name and NTP server.

- Do not activate any availability options at this stage. Click Next and finish the wizard.
- Wait for the configuration to complete and log in with the admin credentials.
- Click Start VMware Aria Operations and wait for the node to go online.

Deploy the Second Node:
- Deploy the second node in vSphere. For production environments, it’s advisable to install the second node in a different location, such as a secondary site if available.

- Start the second node and wait for all services to start.
Configure High Availability:
- Go back to the Operations web page of the first node.
- Click Add Node and specify the name and address of the second node. Set its role as Data Node for now.
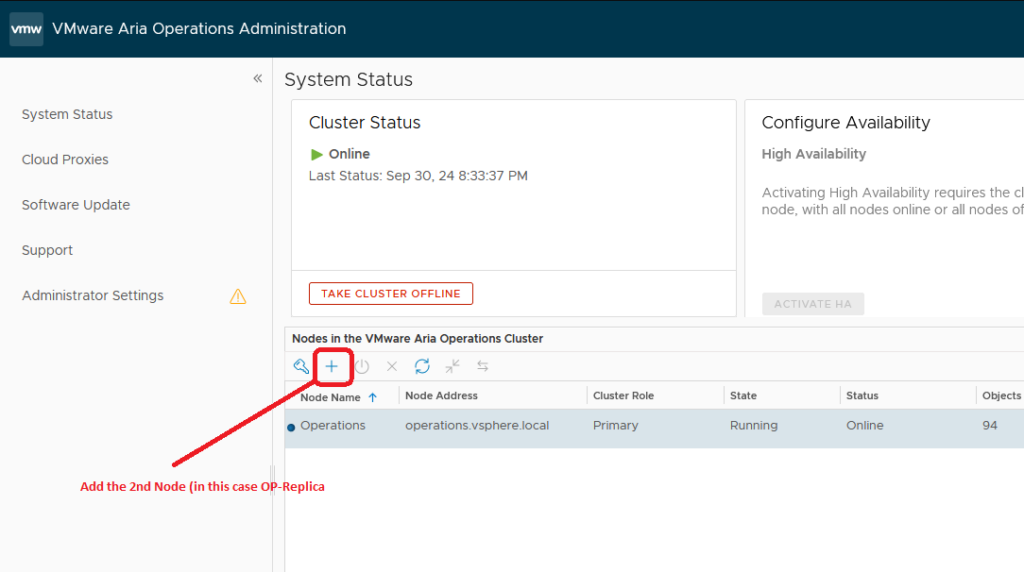

- Provide the admin password and finish the wizard.
- Wait for both nodes to go online.
- Once both nodes are online, the Activate HA option will become available.
- Click Activate HA, Choose the 2nd node, complete the wizard, and wait for the process to finish.
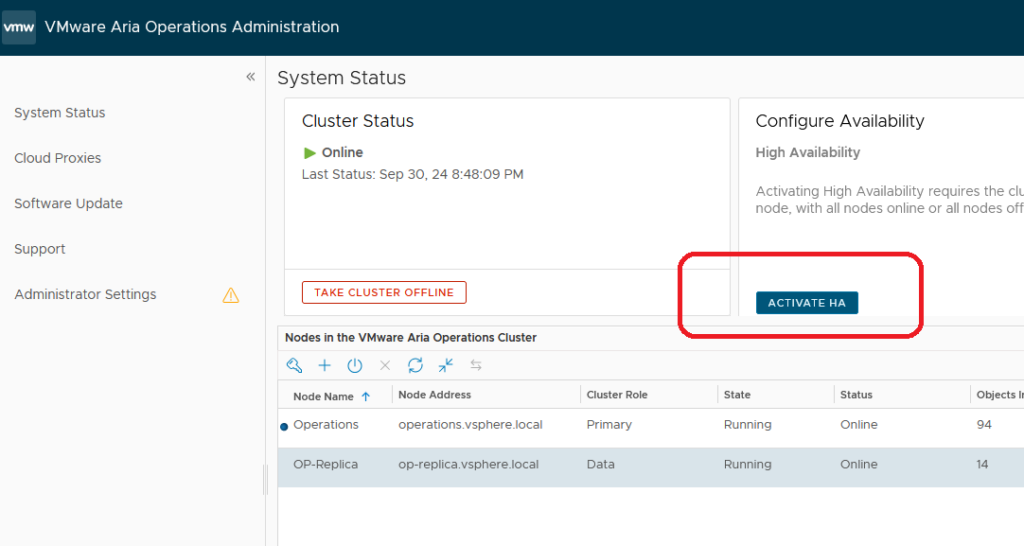
Finally you should see this:
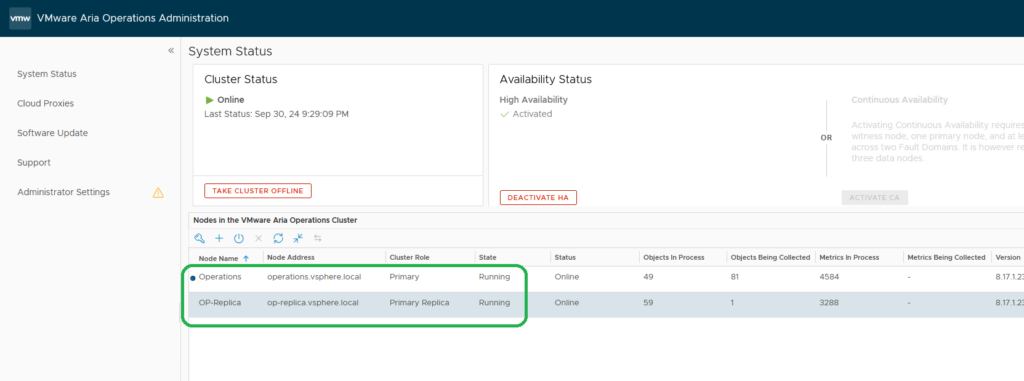
You have successfully installed VMware Aria Operations with high availability.



Hey! Would you mind if I share your blog with my myspace group?
There’s a lot of folks that I think would really appreciate your content.
Please let me know. Thank you
Thanks for finally writing about > Installing VMware Aria
Operations 8 with High Availability –
VM Technics < Loved it!