
VMware Site Recovery Manager (SRM)
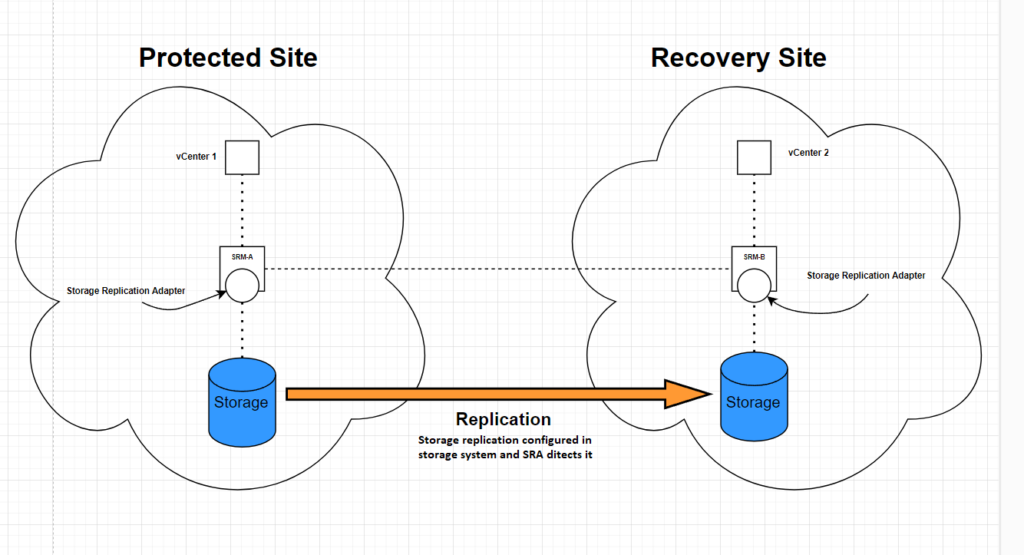
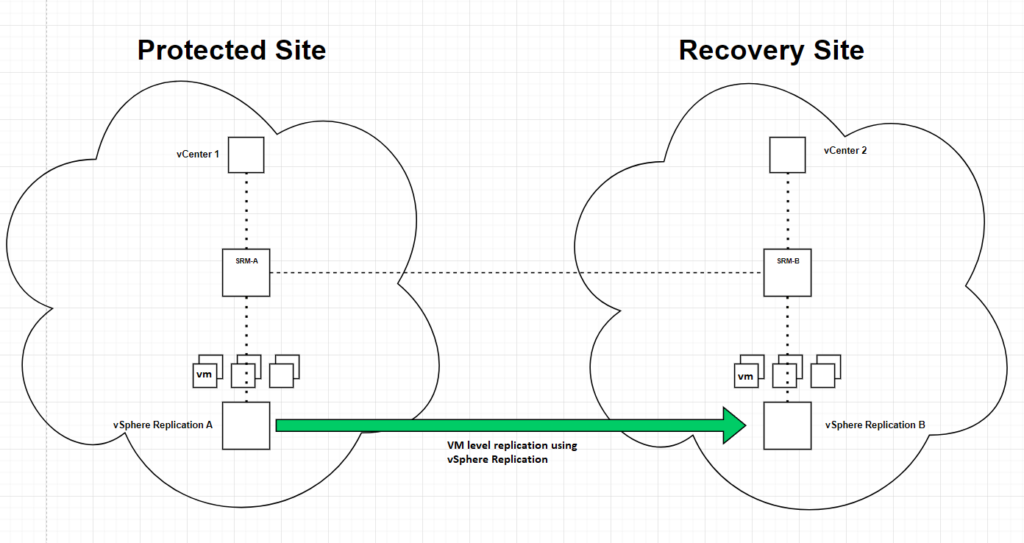
VMware SRM is a software solution that enables failover when a disaster occurs at your primary site, causing partial or full downtime. While SRM is not a replication software, it leverages VM-level and array-based replication to orchestrate failover in a predefined order. The distance between two sites can be thousands of miles, such as one site in Dallas and the other in Tokyo, or both can be in different racks at the same site. You can use synchronous or asynchronous replication and configure it with array-based replication (e.g., Dell EMC Unity) or VM-based replication (e.g., vSphere Replication). Typically, a one-directional recovery scenario is used, although bidirectional recovery is also possible.
You can see two scenarios in the pictures below: the first one illustrates array-based replication, and the second one shows VM-level replication.
Key Concepts
RPO (Recovery Point Objective): The amount of data you can afford to lose in time. For example, an RPO of 15 minutes means you can afford to lose up to 15 minutes of data.
RTO (Recovery Time Objective): The amount of downtime you can afford before services become operational again. For example, an RTO of 1 hour means your services should be back up within an hour of a disaster.
Replication Types
Asynchronous Replication: This type of replication replicates full data initially and then syncs changes on a schedule (e.g., every 30 minutes). It is suitable for links with limited bandwidth. Write requests from applications are first written to the source storage and then sent to the destination storage according to the schedule.
Synchronous Replication: This type of replication replicates data in real-time, requiring high-performance links. Data is written to both the source and destination storage simultaneously, ensuring data consistency. However, it can create bottlenecks if the link performance is limited and latency is high.
Installation and Configuration
Configuring VMware SRM is straightforward but requires careful attention. Both sites must have it’s own Platform Service Controller (PSC) and can be connected to a single SSO domain or both can have it’s own SSO domain. In this scenario, we’ll configure a one-directional setup from Site A (protected site) to Site B (recovery site) with both vCenter servers connected to one SSO domain.
Steps:
DNS Configuration: Add DNS records for all deployments on your DNS server to ensure proper name resolution.

Deploy Appliances: Deploy SRM and vSphere Replication appliances on both protected and recovery sites. If using only array-based replication, vSphere Replication is not needed.
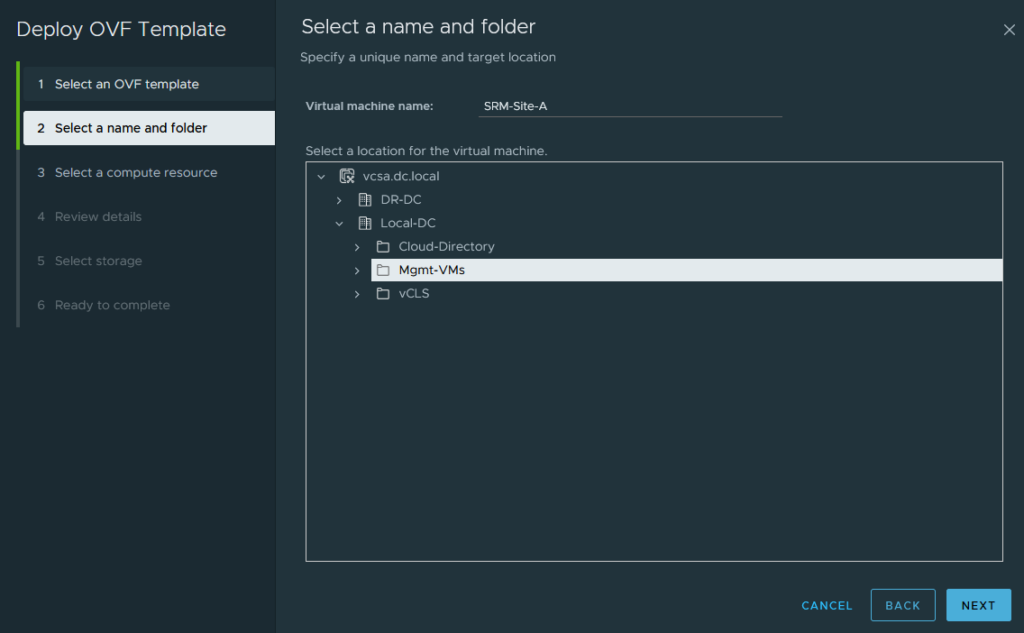
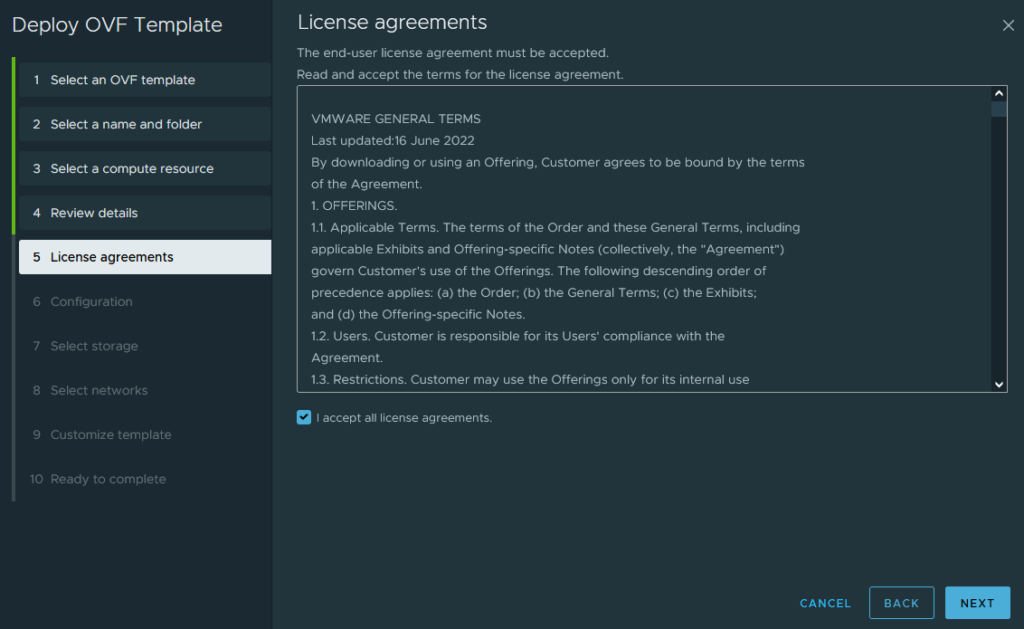
Deployment Process: Follow the deployment wizard for the OVF template. Provide IP addresses, hostnames, DNS servers, and other necessary configurations.
Network Configuration: Ensure network connectivity between sites and create a VMkernel adapter with replication enabled.
Connect Appliances to vCenter: Use SSO credentials to connect appliances to their respective vCenter servers and restart services.
Connection URLs:
Protected Site SRM: https://<srm_site-A_IP_or_fqdn>:5480 should be connected to vCenter Site-A
Protected Site vSphere Replication: https://<vsphere_replication_site-A_IP_or_fqdn>:5480 should be connected to vCenter Site-A
Recovery Site SRM: https://<srm_site-B_IP_or_fqdn>:5480 should be connected to vCenter Site-B
Recovery Site vSphere Replication: https://<vsphere_replication_site-B_IP_or_fqdn>:5480 should be connected to vCenter Site-B
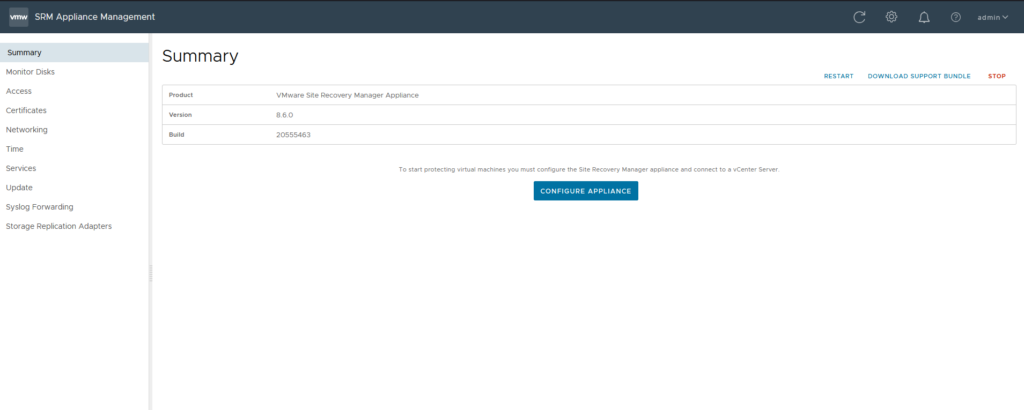
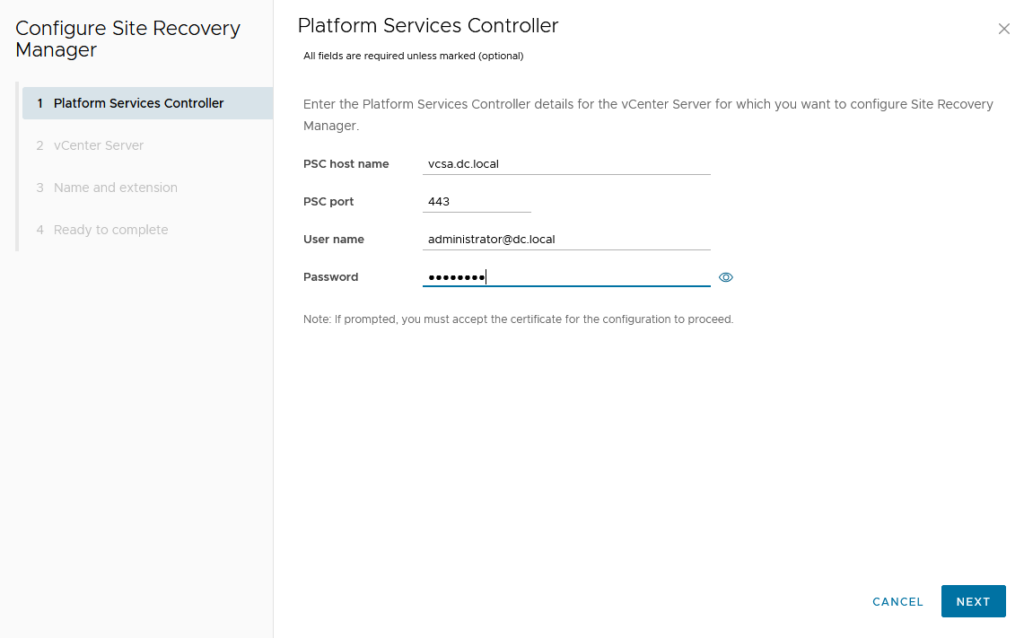
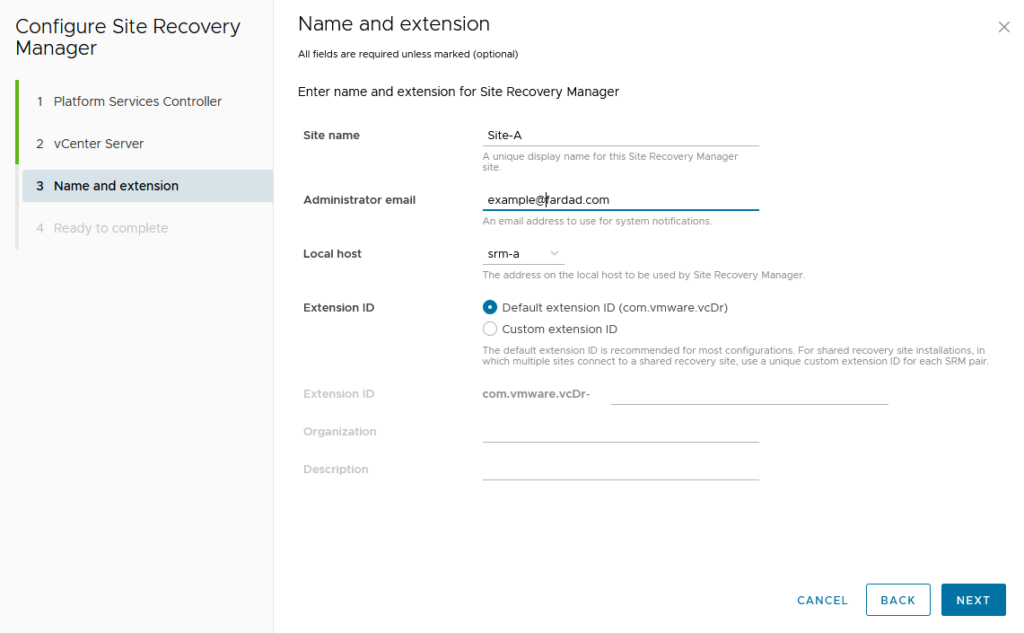
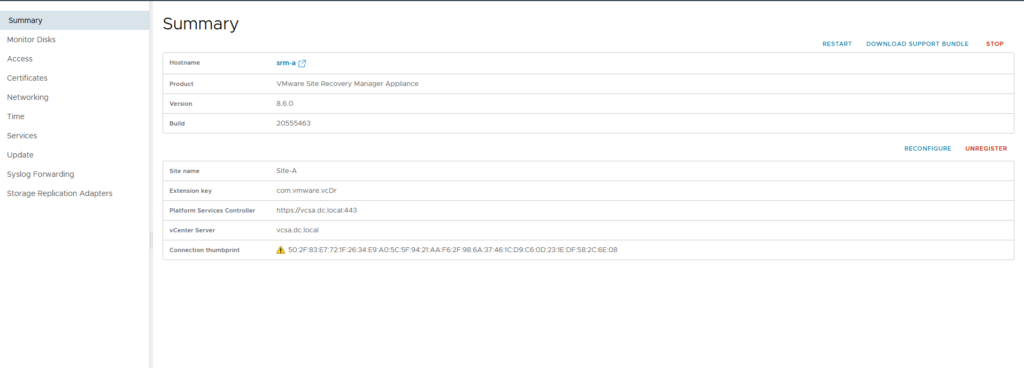
All SRM and vSphere replication appliances should look like picture above
Storage Replication Adapter (SRA): If using array-based replication, add the SRA package to SRM and connect it to the storage system using storage credentials.
Adding SRA: Download the SRA package for your storage system, add it to the SRM console, and configure it with storage credentials. For example I add EMC Unity Replication SRA package.

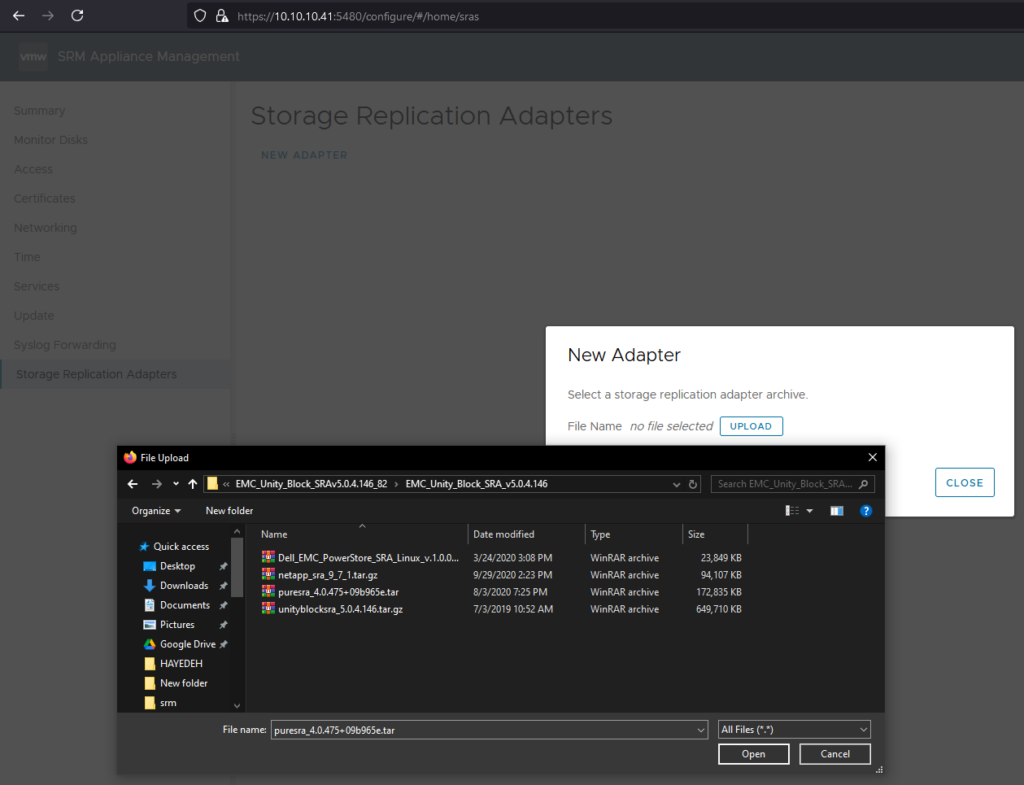
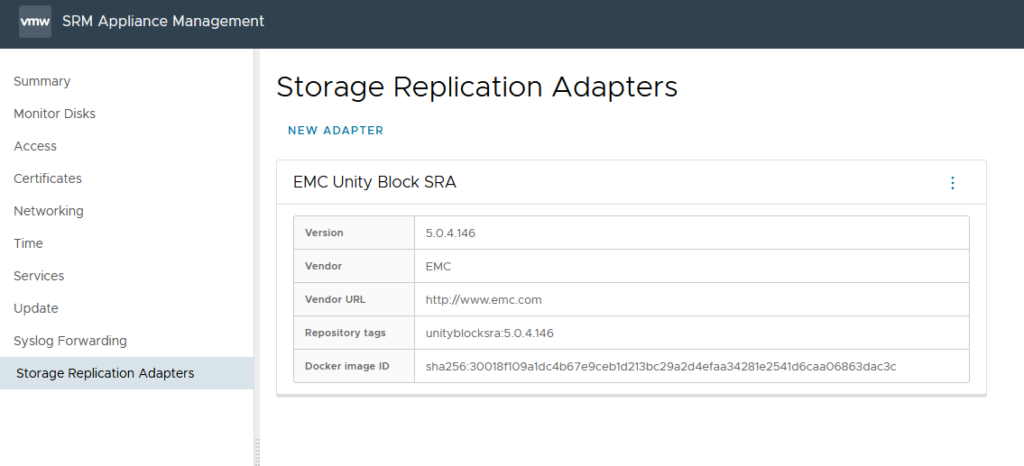
SRA should be added on both SRMs.
Site Pairing: Pair both sites together in SRM. Site Pairing Process: Go to the SRM interface
https://<SRM IP or FQDN>:443 , click on “New Site Pair,” and follow the wizard to pair the sites.

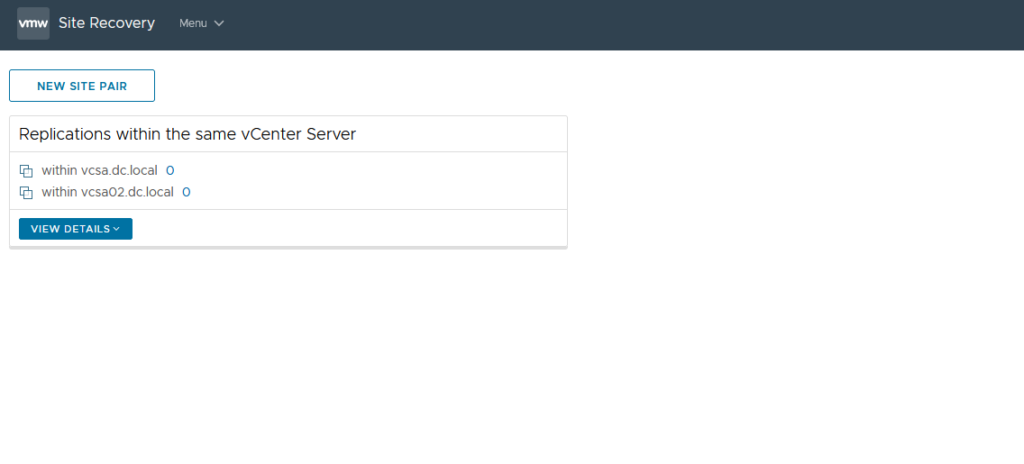
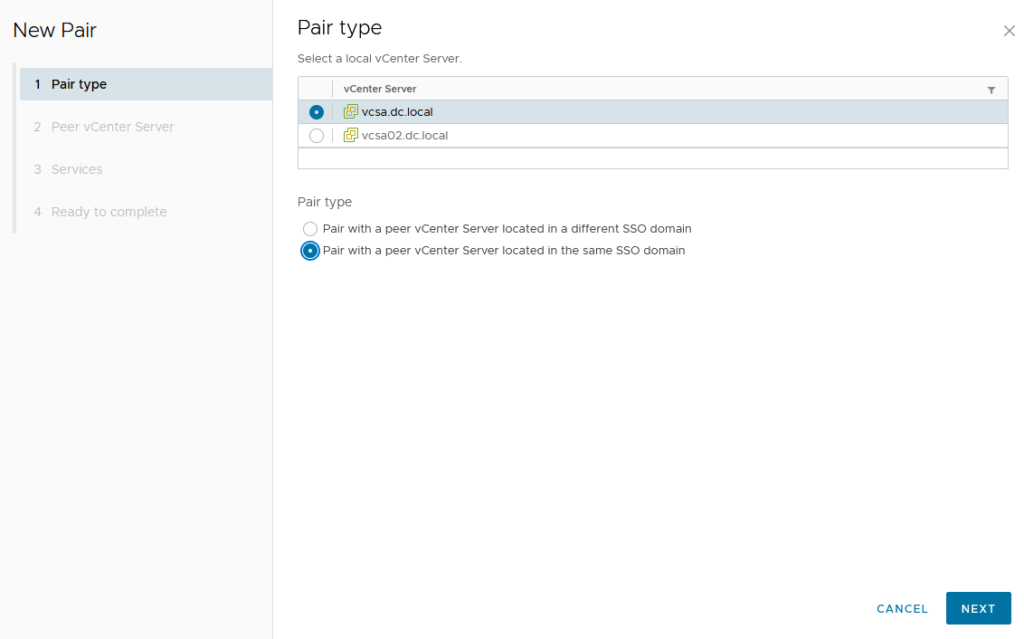
Finish New Pair. Choose one of options based on vCenter server architecture. In this case I choose the 2nd one.
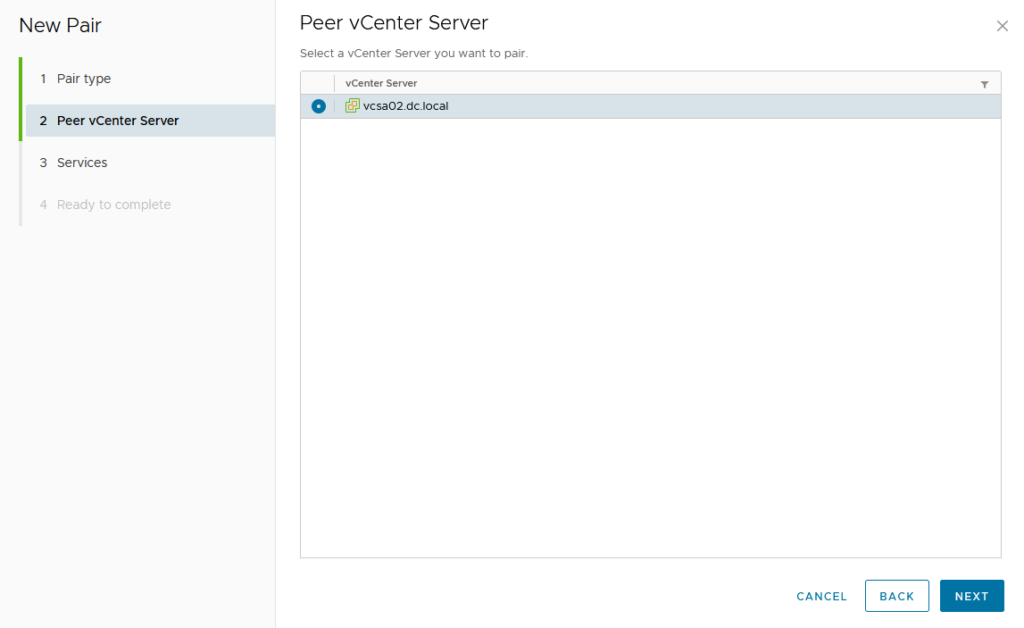
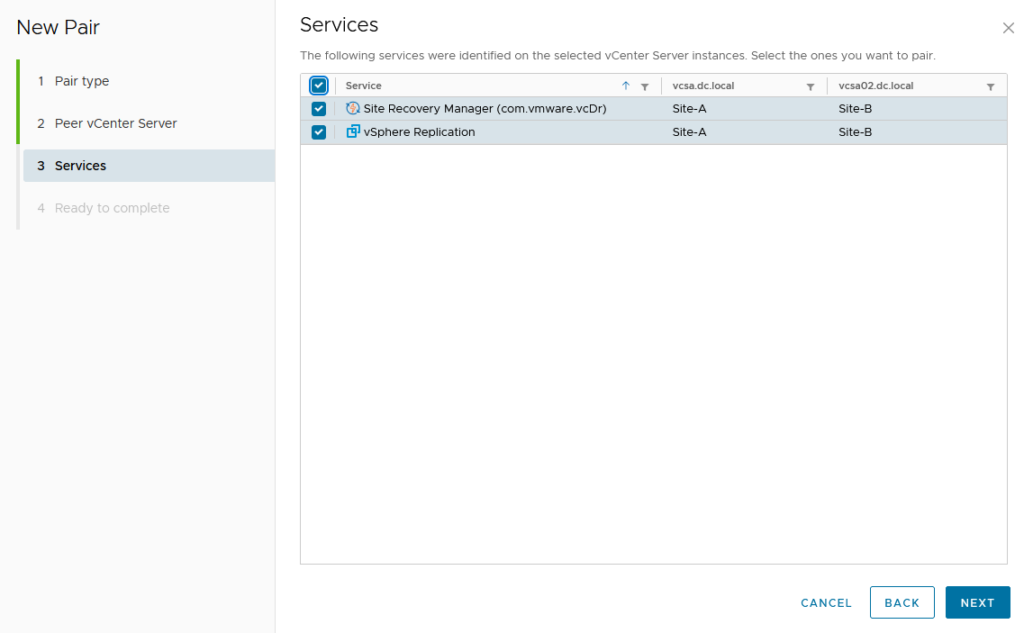
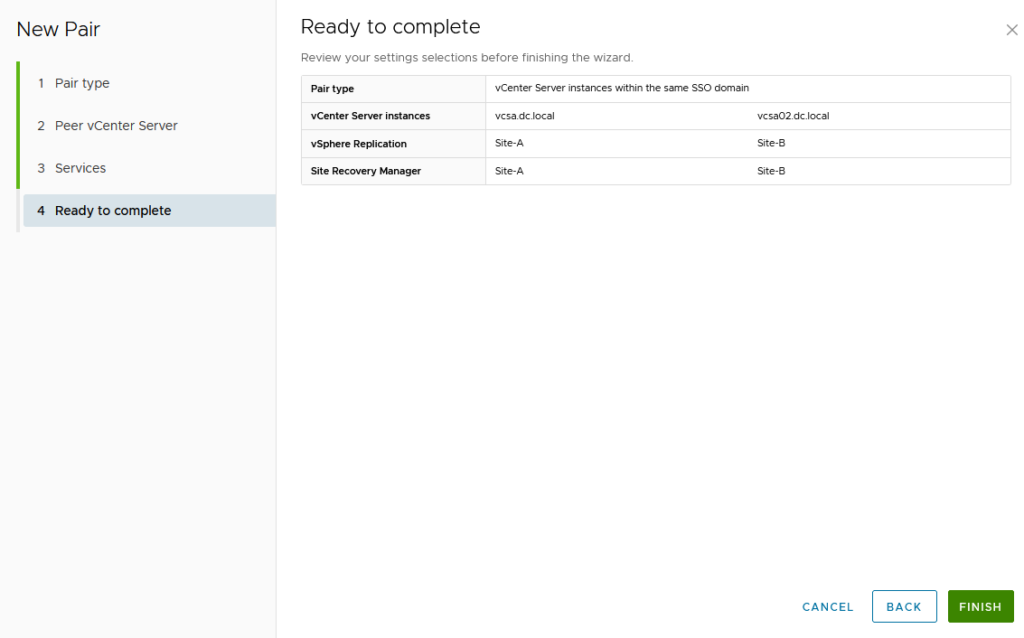
After completing site pair, click on view details.
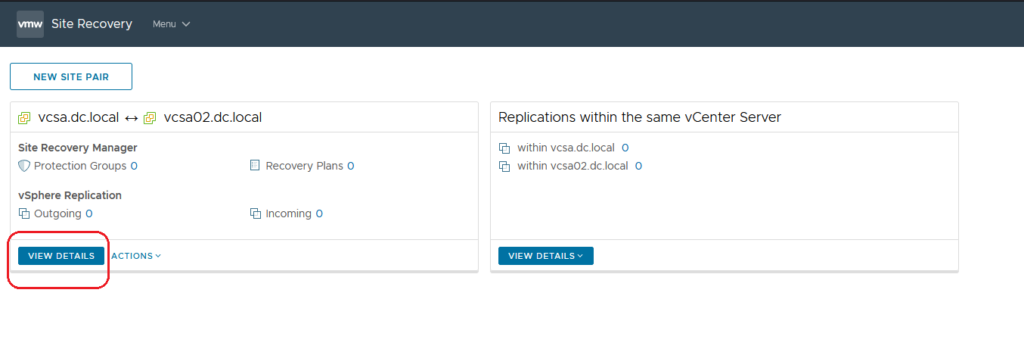
First, review the available configuration options. You should configure these based on your specific needs. For example, when mapping options, ensure that resources in Site A are mapped to their corresponding resources in Site B, and vice versa.
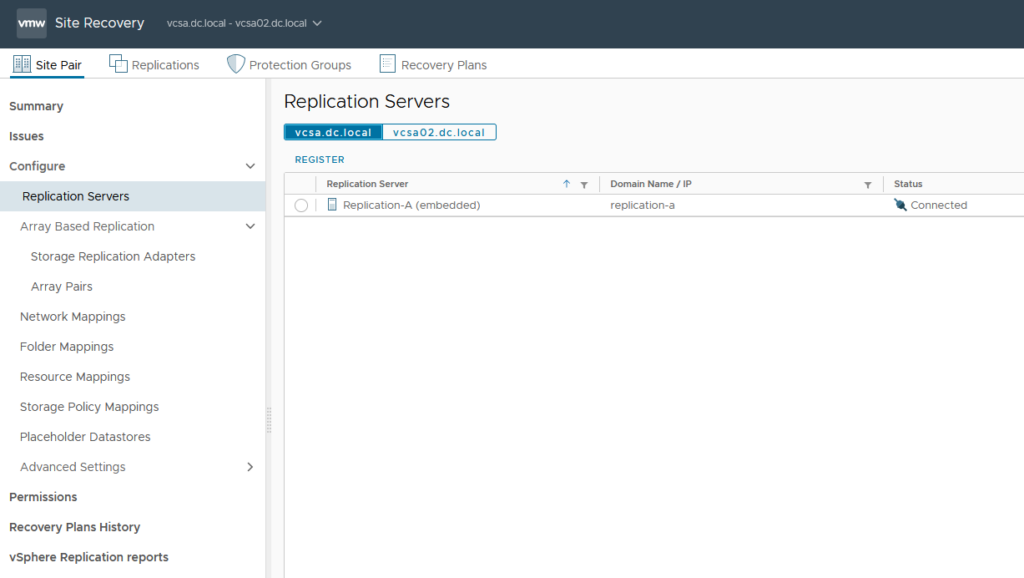
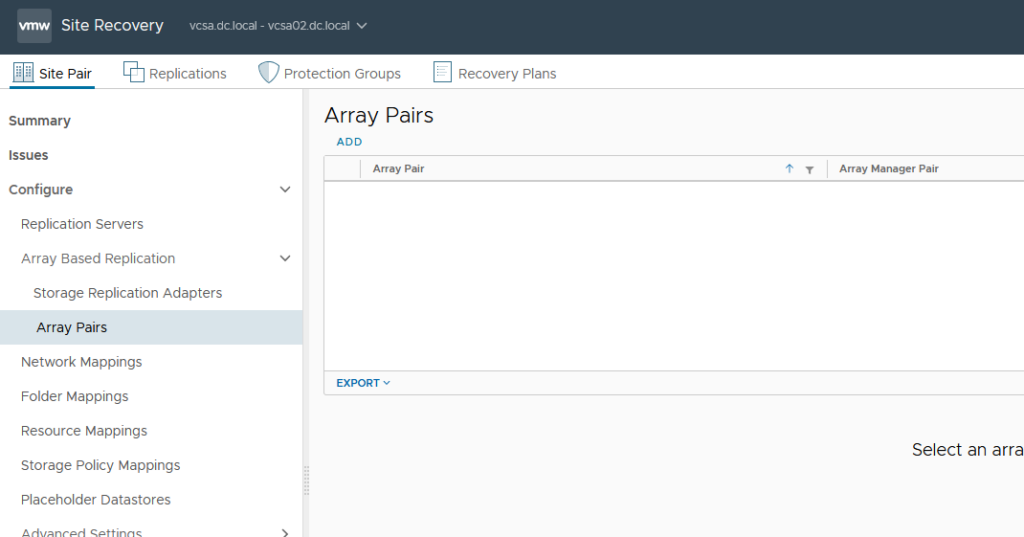
If replication exists between the storage systems in Site A and Site B, and the SRA is connected to the storage systems on both sites, you will be able to see array-based replication here. However, I don’t have SAN storage in my lab. 🙂
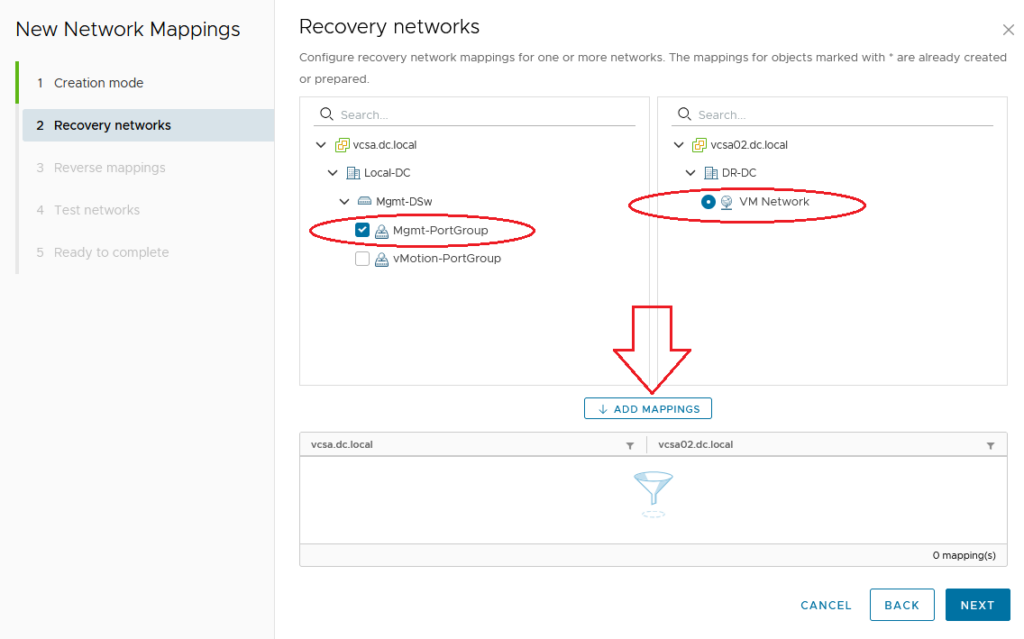
Network Mapping: Ensure that network port groups in the protected site have corresponding port groups in the recovery site with the same configuration. Do the same configurations for all other mapping objects like folder mapping and resource mapping.
Placeholder Datastore: Each replicated VM will have a VM folder in the placeholder datastore that contains only the VMX file. The stored VM files in placeholder datastore represent shadow of protected VMs. You cannot start this VM when the VM is accessible in protected site. The placeholder datastore must be configured regardless of whether your replication scenario is at the VM level or array-based.
Note: You should choose a datastore as a placeholder datastore in recovery site diffrent than the replication target datastore.
Replication Configuration: You don’t need to configure replication directly on vSphere Replication. After installing it and connecting it to the vCenter on both sites, you can create replication in VMware SRM.
Go to the second tab on the top bar (Replication). This tab appears once you have installed vSphere Replication and connected it to vCenter.
Create a new replication. Be mindful of the direction of replication.

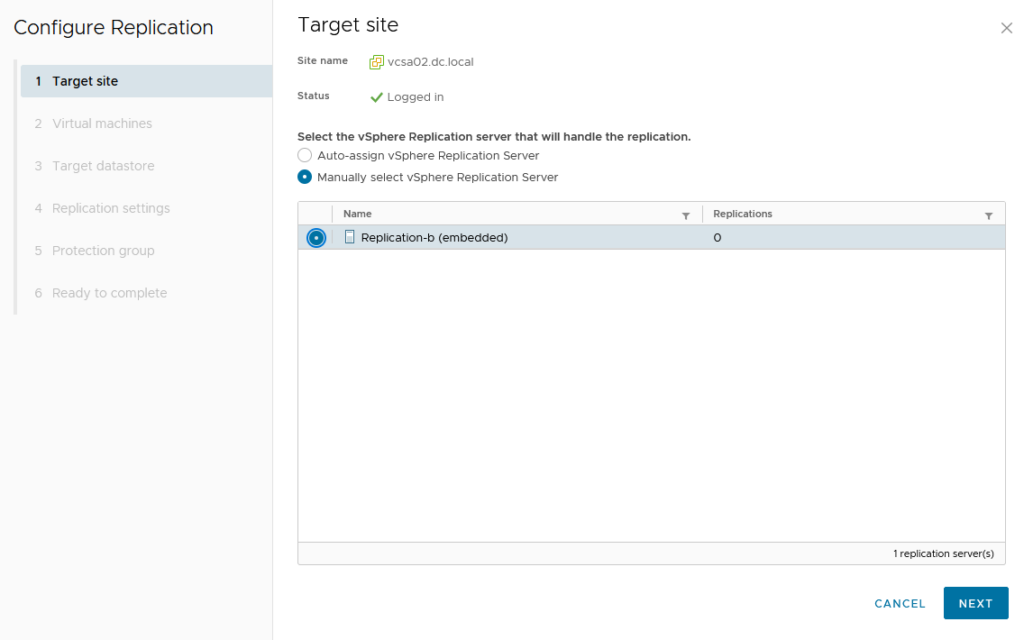
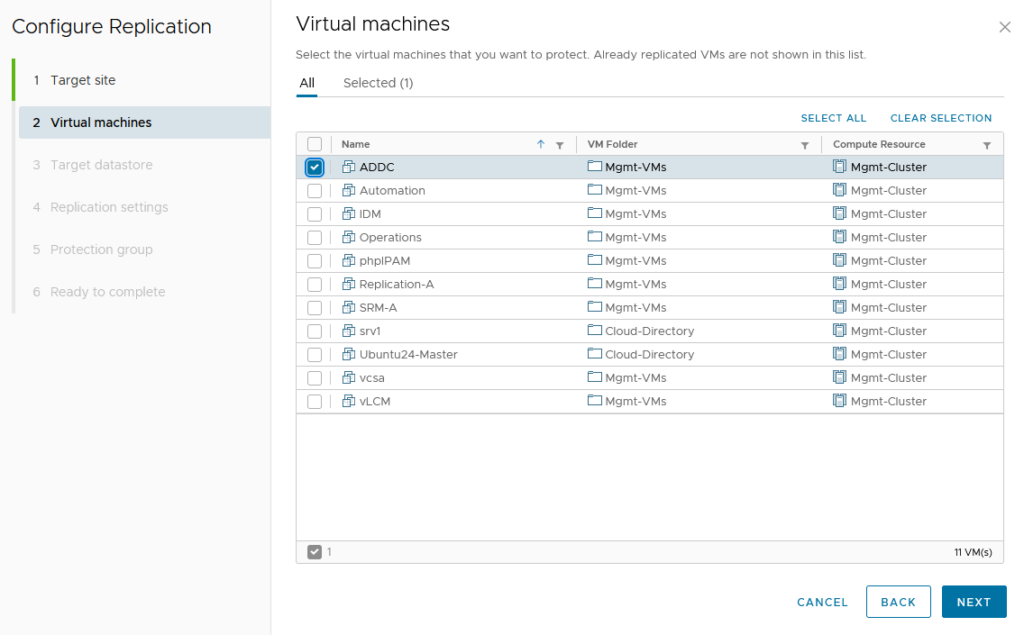
Choose VMs you want to replicate. In this case I selected ‘ADDC’
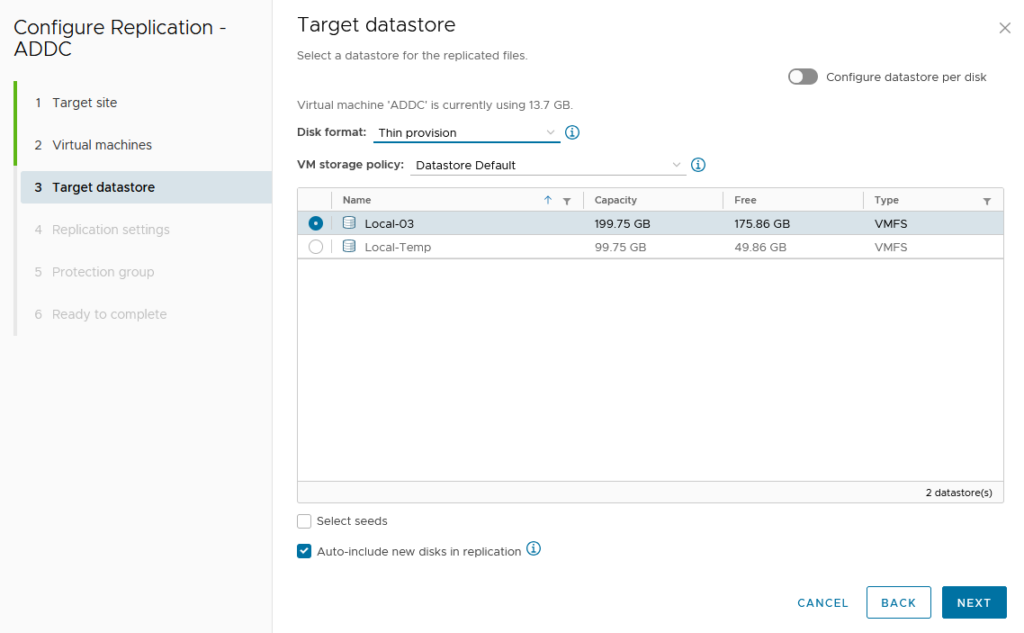
Select the target datastore in recovery site that all VM data should place.
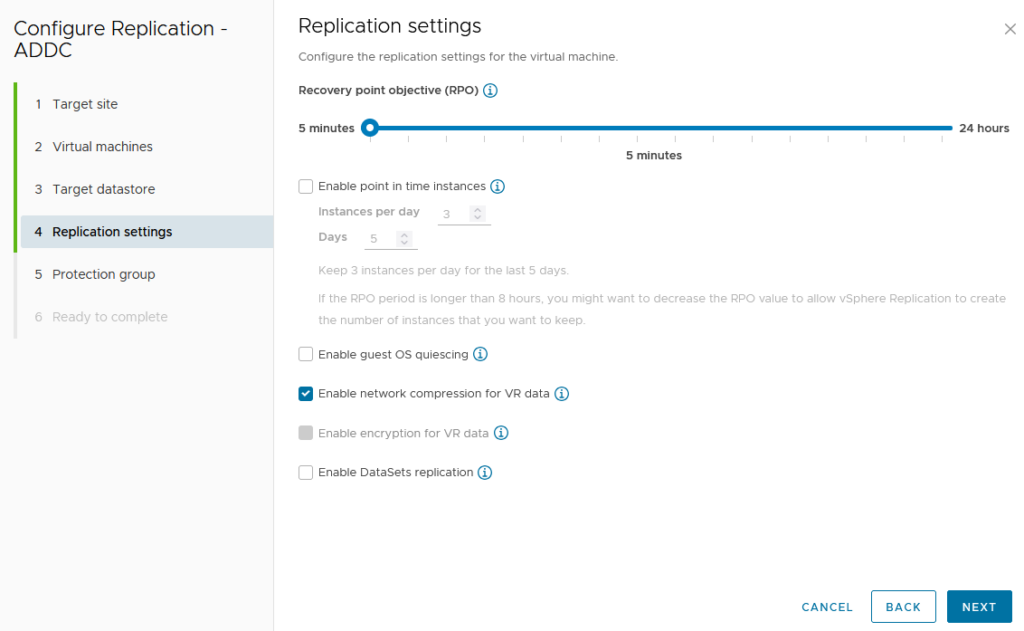
The picture below highlights a key aspect of vSphere Replication, which only supports asynchronous replication. Understanding RPO (Recovery Point Objective) and RTO (Recovery Time Objective) is crucial. RPO defines the maximum acceptable time interval between the last data sync to the destination datastore. For a small number of replicated VMs, a 5-minute RPO might be sufficient. However, for a larger number of VMs, it’s important to monitor replication performance to determine the optimal RPO. Enabling point-in-time instances, similar to snapshots, can enhance reliability by preserving specific states of your data, though this requires additional storage capacity. Additionally, enabling guest OS quiescing, if supported by the OS, can improve reliability by flushing data from memory to disk during replication.
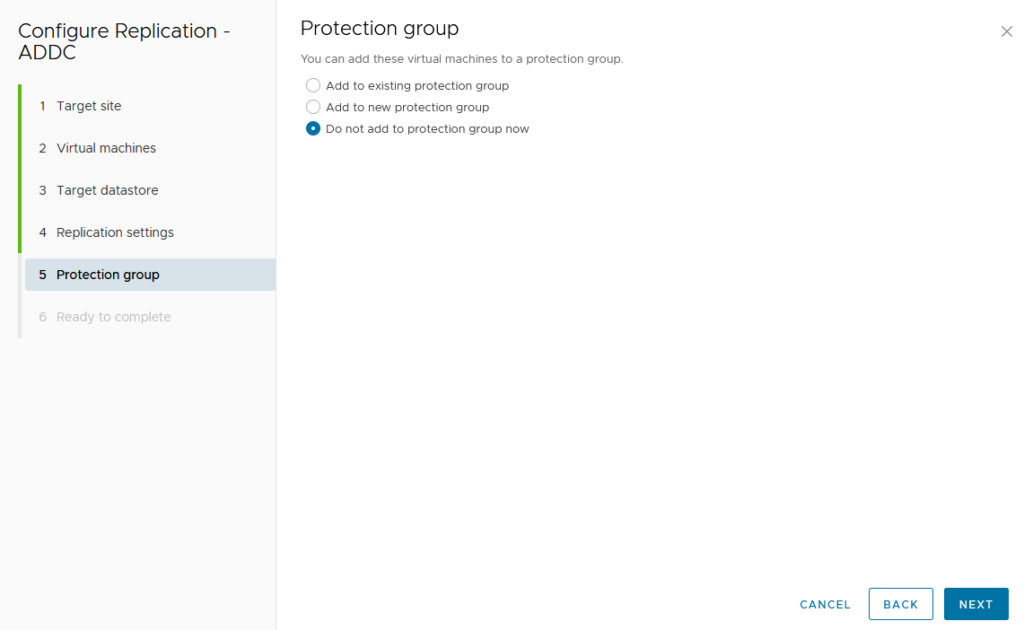
In this case I choose not to create a protection group but you can create it here.
After creating and running the replication, wait for it to make a full copy of the data in the destination datastore.
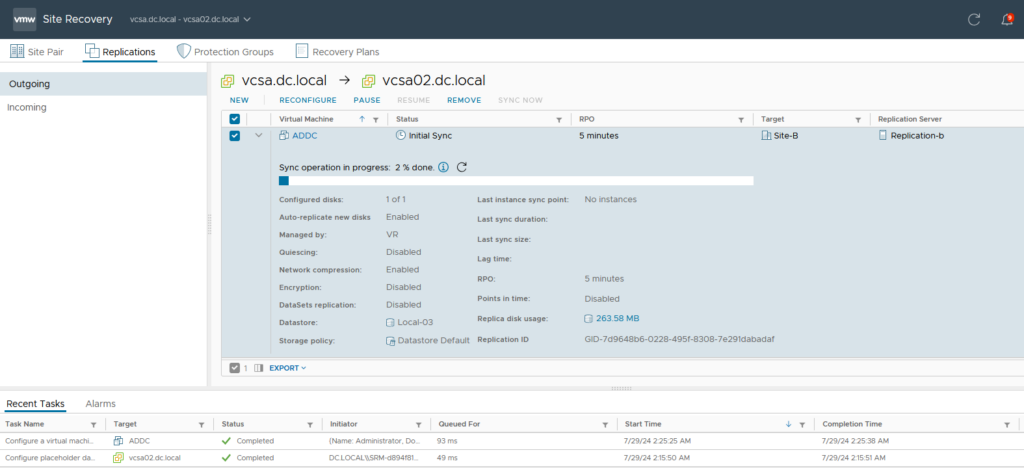
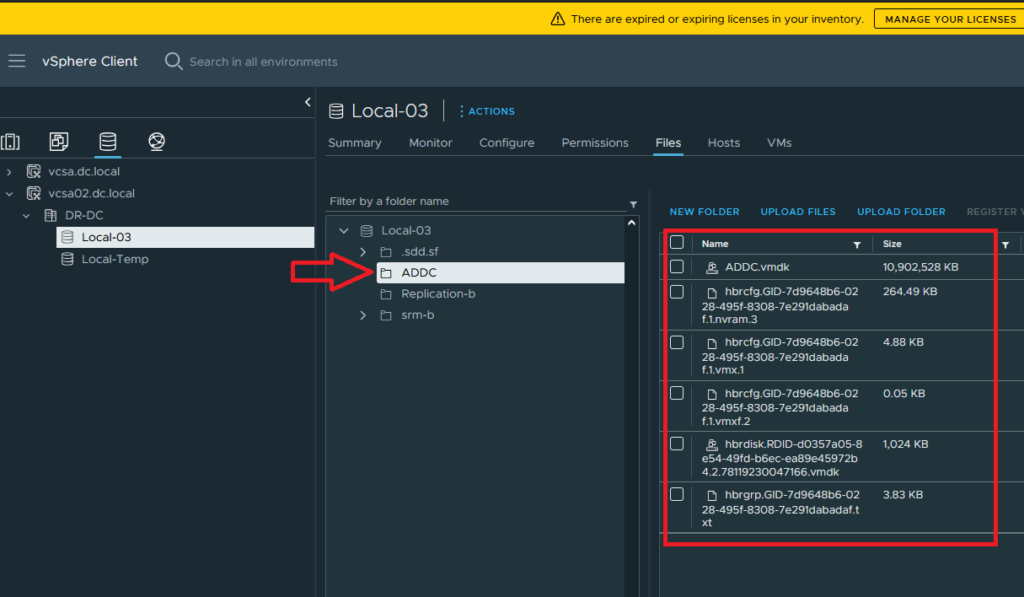
Once the replication is complete, you will see the target destination datastore in Site B.
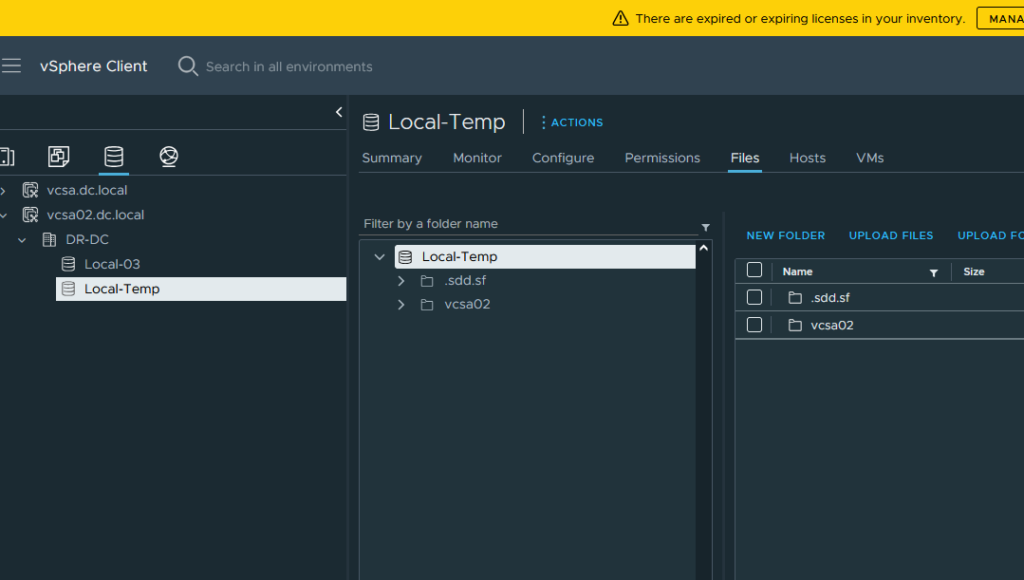
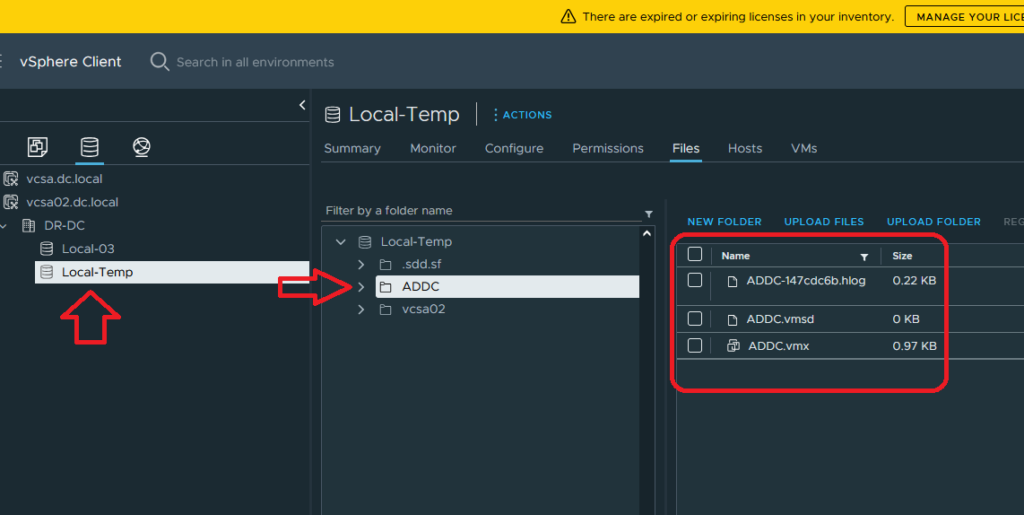
The VM replication completed but as you can see there is nothing related to replicated VM in the placeholder datastore (in this case Local-Temp)
Protection Groups: Create protection groups for VMs to be protected at the recovery site.
Protection Group Creation: Go to the “Protection Groups” tab, click “New,” and follow the wizard to create a protection group.
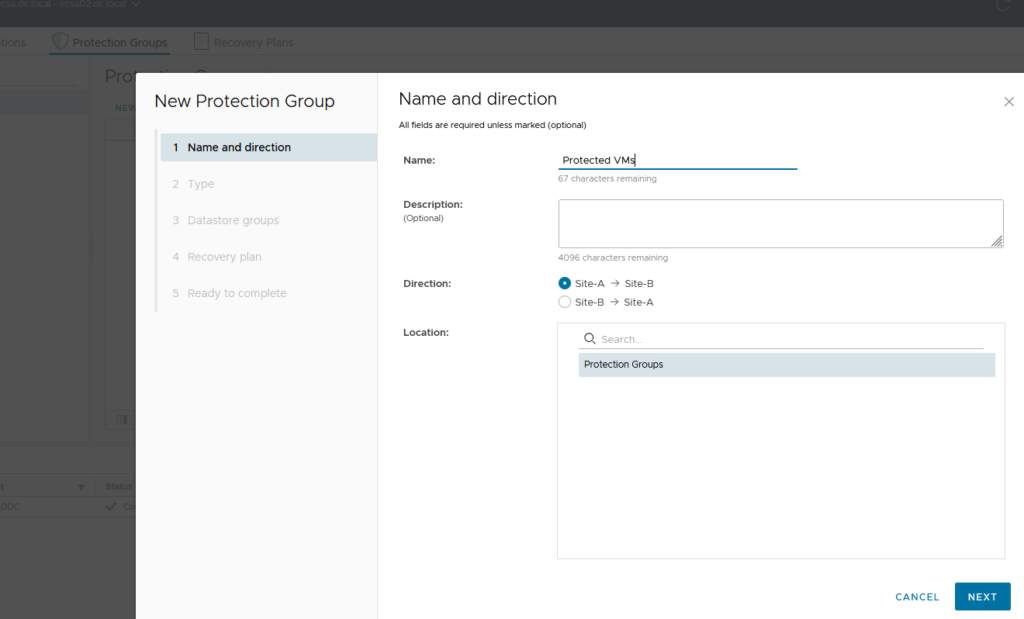
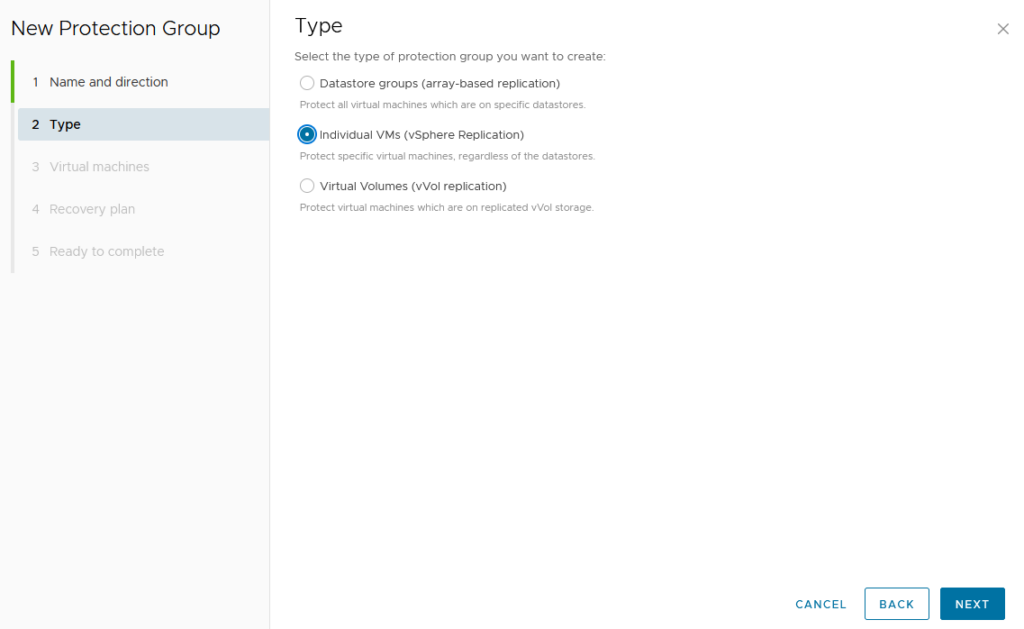
Select the storage Select VMs of this protection Group Type base on replication scenario. in this case vSphere Replication.
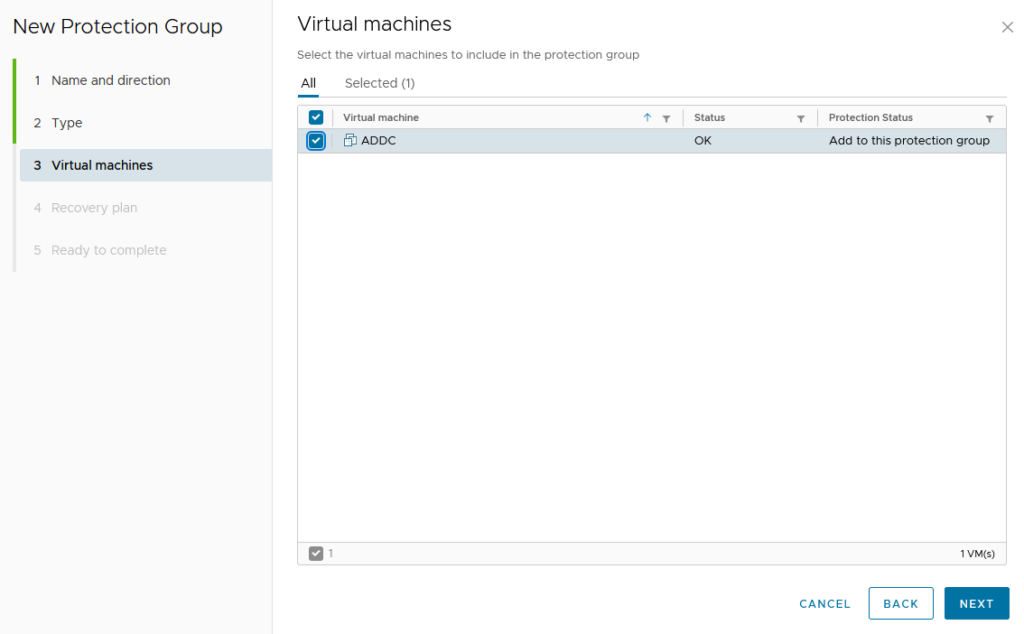
Choose VMs you replicated and you want to protect.
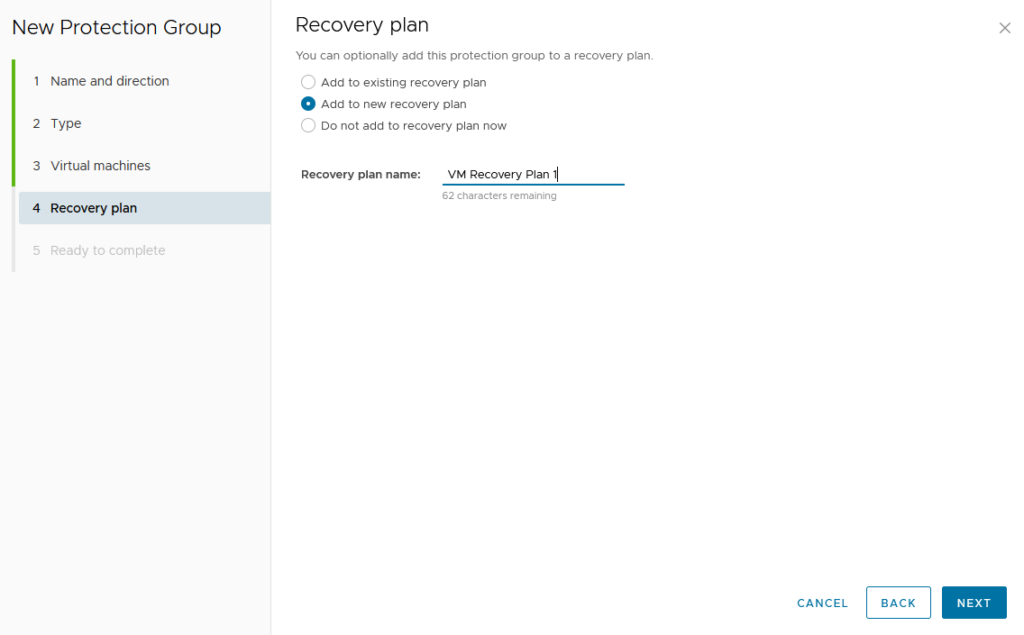
I choose to create Recovery Plan here related to this protection Group.
As you can see, this datastore (Local-Temp) is not the destination datastore. It is the placeholder datastore for this site pair, located on Site B. The replicated VM has a folder here. Before creating the protection group and recovery plan, there was nothing related to replicated VMs in this datastore. Now, you can see a VM folder only contains the VMX, HLOG, and VMSD files, which represent the shadow VM of the protected VM.
Recovery Plan Setup: Go to the “Recovery Plans” tab, click “New,” and follow the wizard to create a recovery plan if you need to create a Recovery Plan but I created a Recovery Plan in the previous step.
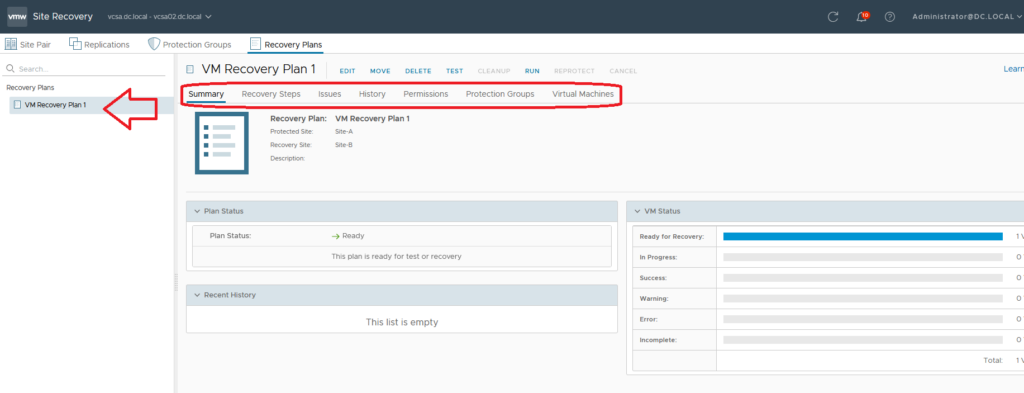
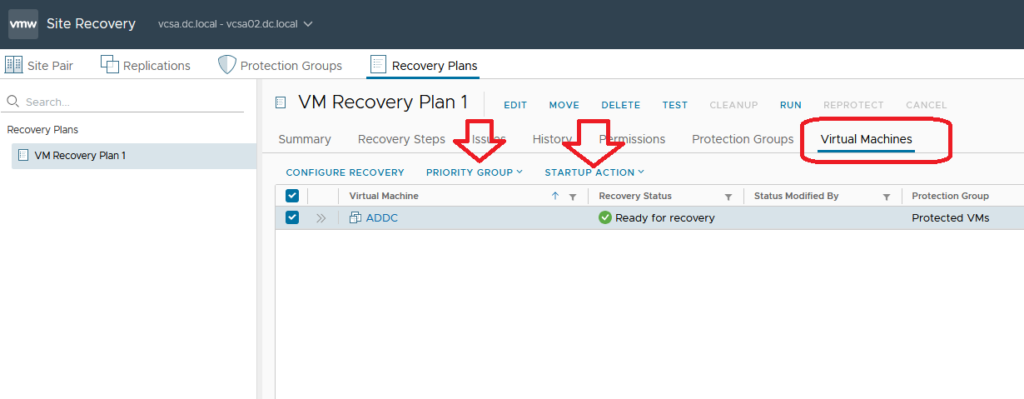
In this section, you can configure recovery steps such as VM priority and startup actions. Additionally, you can set advanced configurations like Run Commands, Display Messages, Suspend Non-Essential VMs, Dependencies, Customize Network Settings, and Change Recovery Priority for each VM.
Running Tests and Recovery
Test Recovery Plan: Run a test to verify the recovery process without affecting protected VMs.
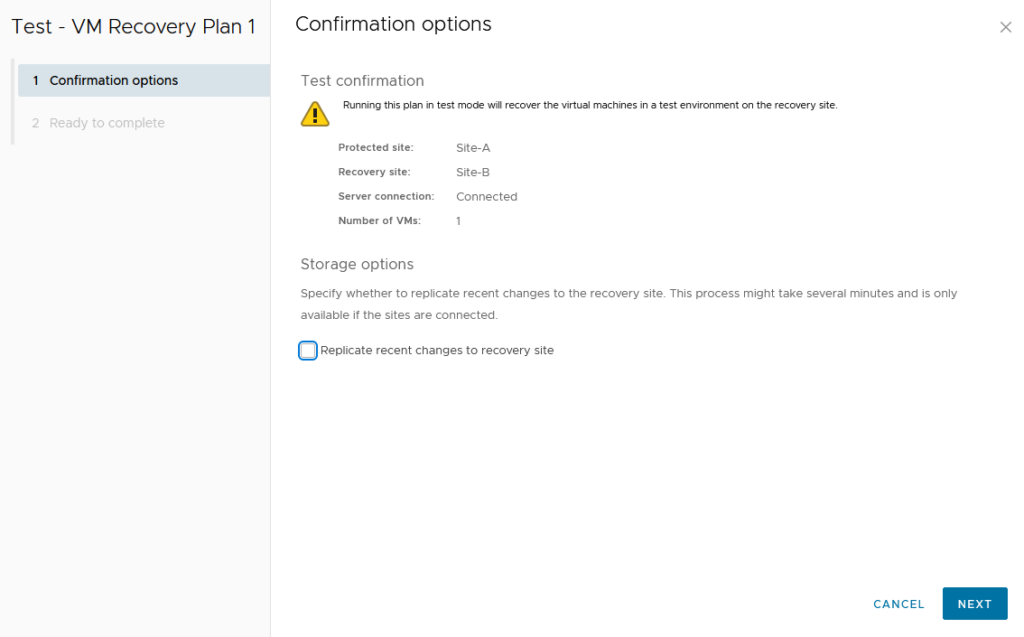
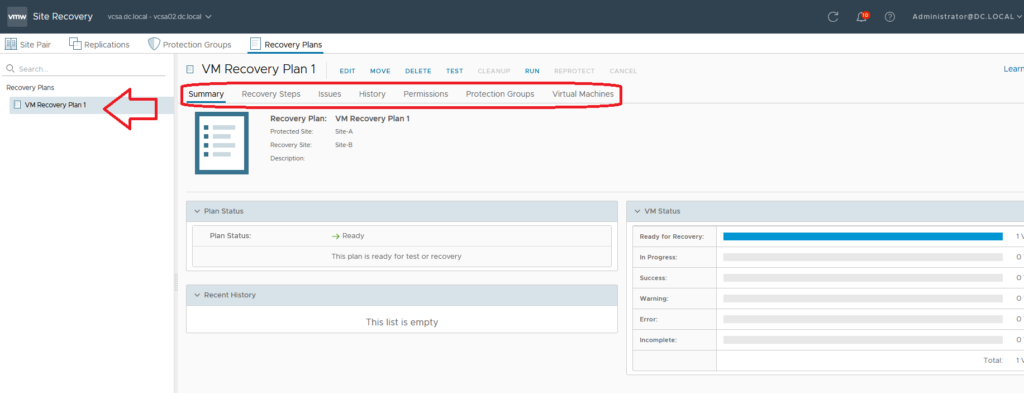
Cleanup after the test.
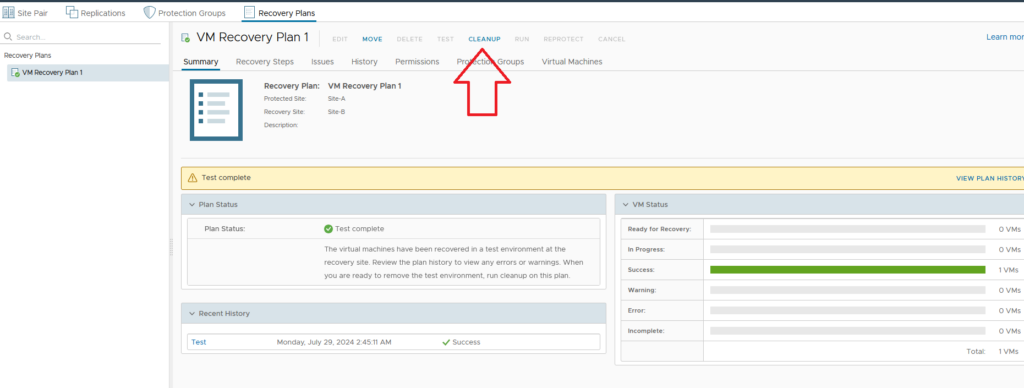
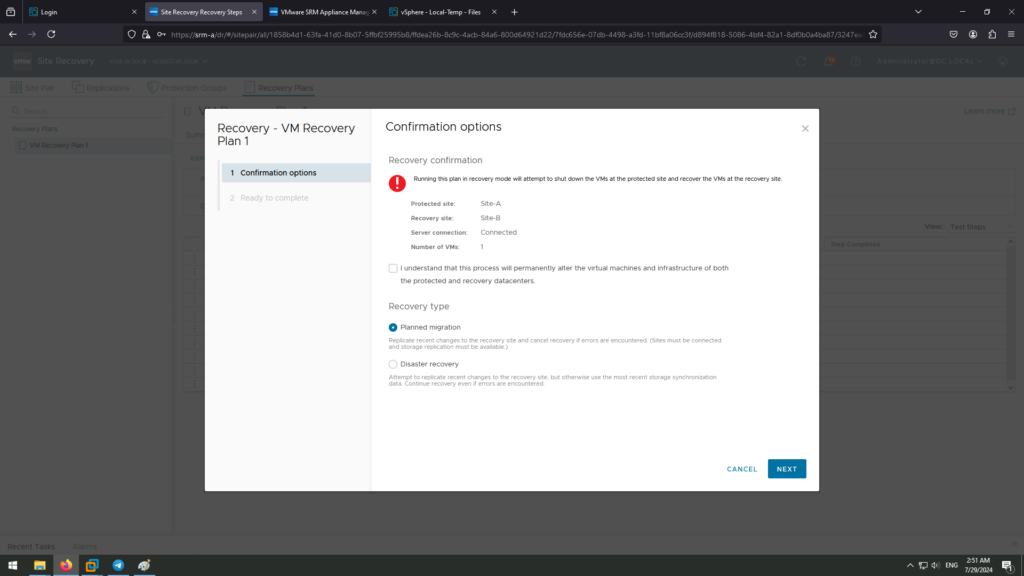
Disaster Recovery: If the primary site is inaccessible you should run “Disaster Recovery” on SRM Site B. On the Recovery Plans Tab select the desired recovery plan and click on Run and select “Disaster Recovery”.
Planned Migration: If you want to migrate VMs from Site A to Site B run and choose “Planned Migration” . VMs in Site A will shut down gracefully and start in Site B.
If you have any questions about VMware Site Recovery Manager, feel free to comment below.

How can I find out more about it?
You helped me a lot by posting this article and I love what I’m learning.
I’m so in love with this. You did a great job!!
Good web site! I truly love how it is easy on my eyes and the data are well written. I am wondering how I could be notified whenever a new post has been made. I’ve subscribed to your RSS which must do the trick! Have a nice day!
Thank you for writing this post!