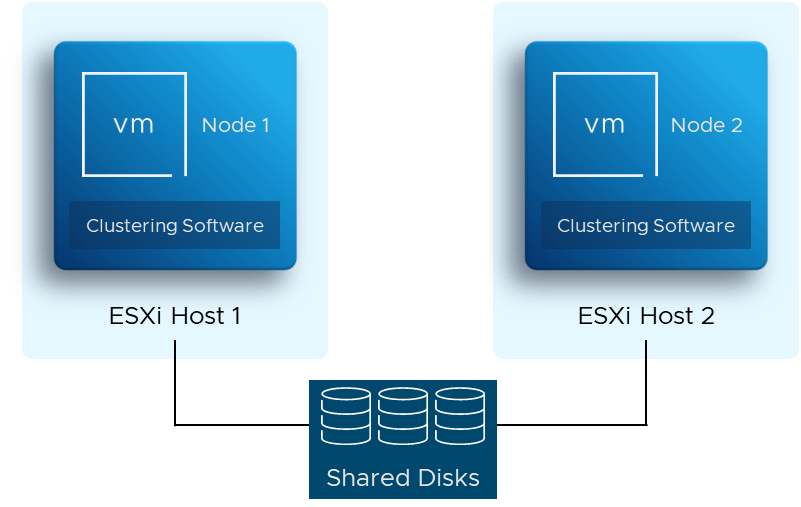
Configuring a Shared RDM Device Over Fiber Channel Storage for Multiple VMs
Configuring a Shared RDM Device Over Fiber Channel SAN Storage for Multiple VMs
In VMware vSphere, setting up a shared Raw Device Mapping (RDM) device can be particularly useful for scenarios such as creating a Microsoft Windows Failover Cluster (WSFC) in a production environment. Here’s a step-by-step guide to configuring a shared RDM device accessible to multiple VMs over Fiber Channel SAN storage:
- LUN Provisioning: Obtain a LUN from your SAN storage and map it to the ESXi hosts where the two VMs are located. It’s recommended to make the LUN accessible to all ESXi hosts in the cluster to facilitate VM migration between hosts when necessary.
- WWN Generation: Navigate to the virtual machine settings, select ‘VM Options’, then ‘Fiber Channel NPIV’ and click on ‘Generate New WWNs’.
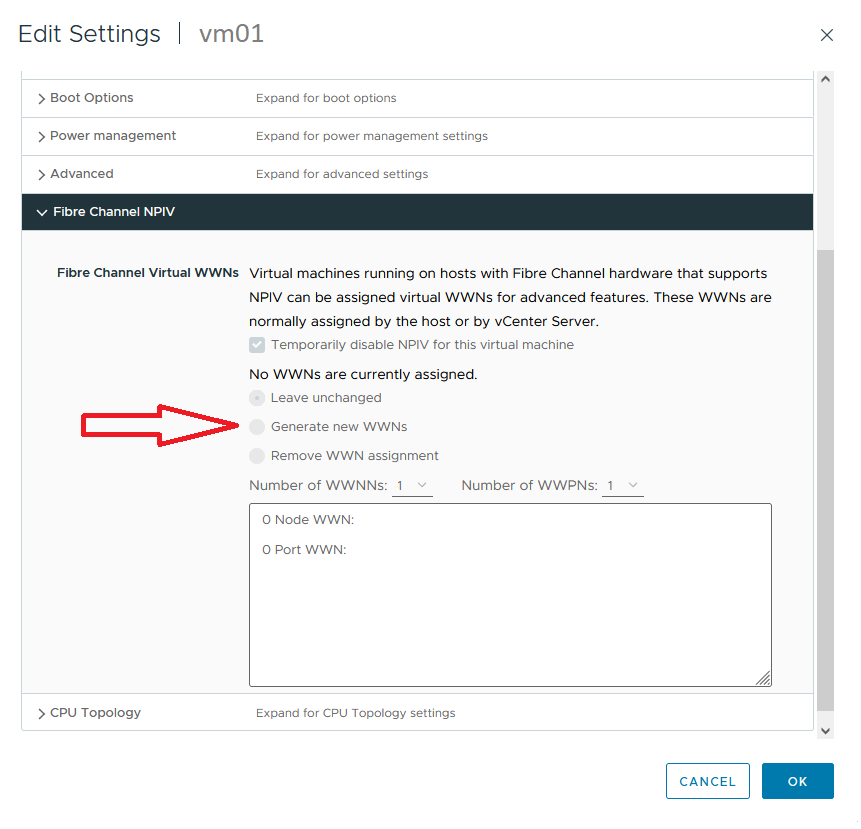
- SAN Storage Mapping: Copy the generated WWNs (both port and node WWNs) and add them as new initiators in your SAN storage’s LUN mapping.
Note: If there’s a SAN switch between the storage and hosts, you’ll need to add the VM WWNs as initiators and create new zones between these VM initiators and target ports. For peer zoning, simply add the VM WWNs as peer members to the existing zone and save the changes.
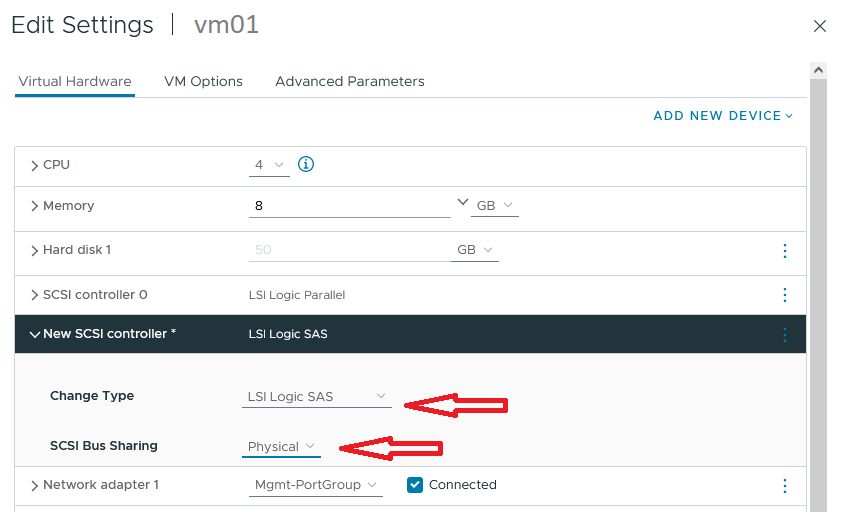
- SCSI Controller Configuration: For each VM, create a new SCSI controller by right-clicking on the VM, selecting ‘Edit Settings’, ‘Add New Device’, and expanding the new SCSI controller settings. Change the type to ‘LSI Logic SAS’ and set SCSI bus sharing to ‘Physical’.
- RDM Disk Addition: After making the LUN accessible to the VMs, right-click on one of the VMs, select ‘Edit Settings’, ‘Add New Device’, and choose ‘RDM Disk’. Select the exact LUN listed as the storage device you wish to use as an RDM disk. Then, adjust the new disk’s settings to ‘Physical’ compatibility mode, enable ‘Multi-Writer’ sharing, and assign the virtual device node to the new SCSI controller (e.g., SCSI Controller 1).

Note: A metadata file will be created in the directory of the first VM to which you add the RDM disk. This file contains information about the RDM disk, not the data itself.
- Second VM Configuration: Repeat the SCSI controller configuration for the second VM, ensuring the settings match those of the first VM.
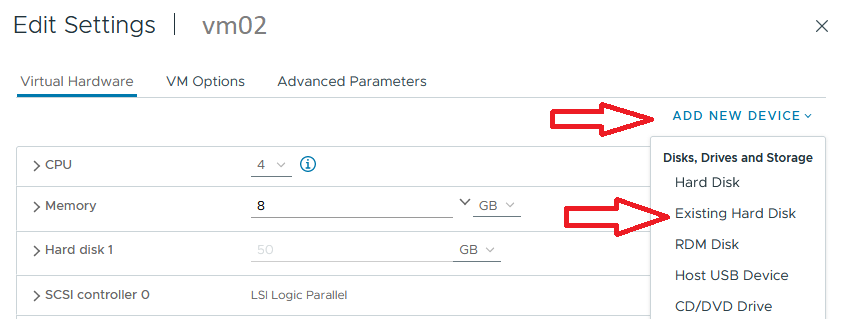
- Existing Hard Disk Addition: Right-click on the second VM, go to ‘Edit Settings’, ‘Add New Device’, and select ‘Existing Hard Disk’. Navigate to the folder where the first VM resides and select the metadata file with the ‘.vmdk’ extension. Set the sharing to ‘Multi-Writer’ and assign the virtual device node to the same SCSI controller and port as the first VM (e.g., SCSI(1:0)).
- Guest OS Verification: Verify that the new disk is accessible from both VMs’ guest operating systems.
For Windows: Press WinKey + R, enter diskmgmt.msc, and check for the new disk.
For Linux: Run ls /dev/ in the terminal to locate the new disk.
Once you see the new disk accessible from both VMs, you can proceed with your service-level cluster configuration.

